-->

Wednesday, May 21, 2014

The All Echino Super Loud Supertote!

Well, after I decided I couldn't piece on my Janome (with my Pfaff in the shop!) I set about cutting out another noodlehead Super Tote, using my hoarded Echino.


I made it as a replacement for our family's "magic bag" a tote the children earned by participating in the summer reading program at the library one year. What made this bag magic was that it had a tag that had a sensor in it that the library's book check out sensor could read and you could check out books without getting out your library card. But the sensor broke after a few months, and a few months later, the library changed check out systems, but it was always and forever a magic bag, though a few weeks ago, we began to notice holes in the bottom. So, clearly, a new library bag was in order. And it had to be big, because we routinely have 30-70 books out at a time. Naturally, I thought of a super tote, because it's the bag I carry to work, and it's huge.


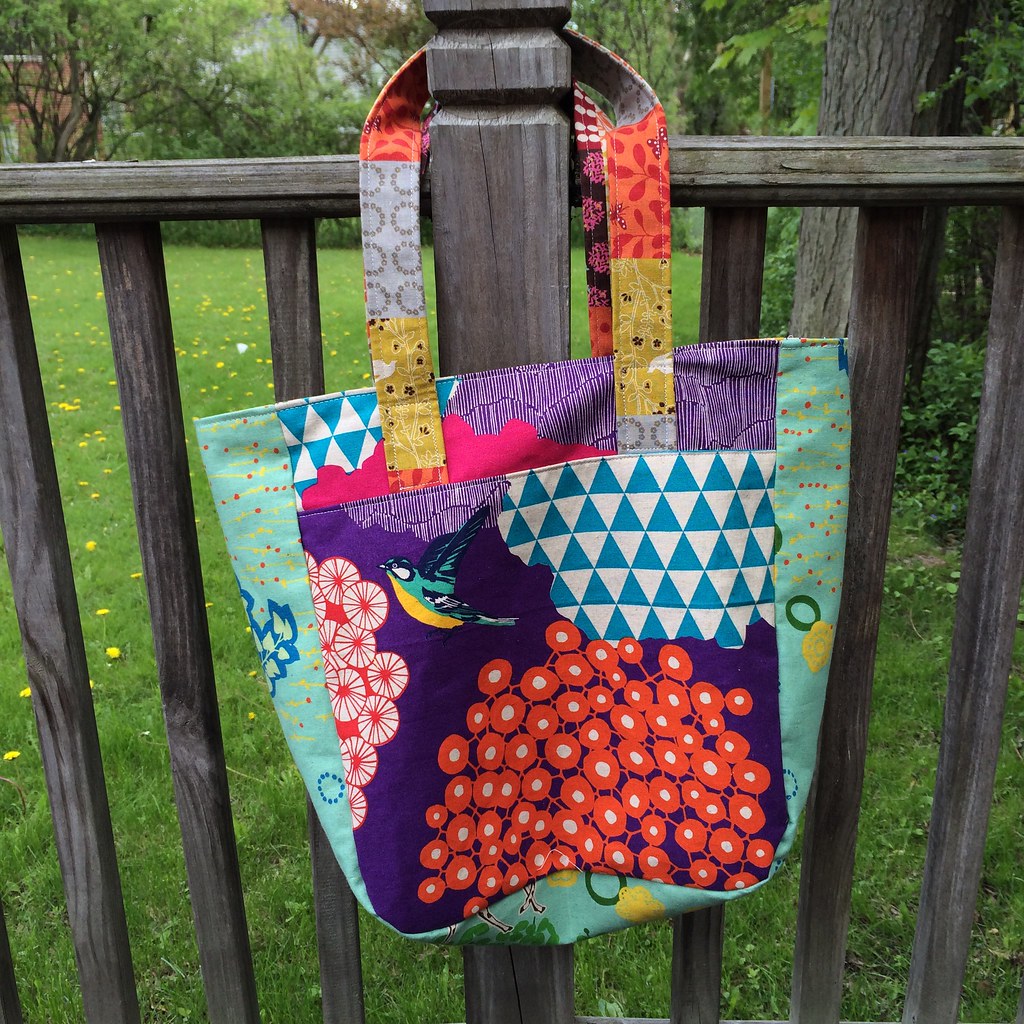
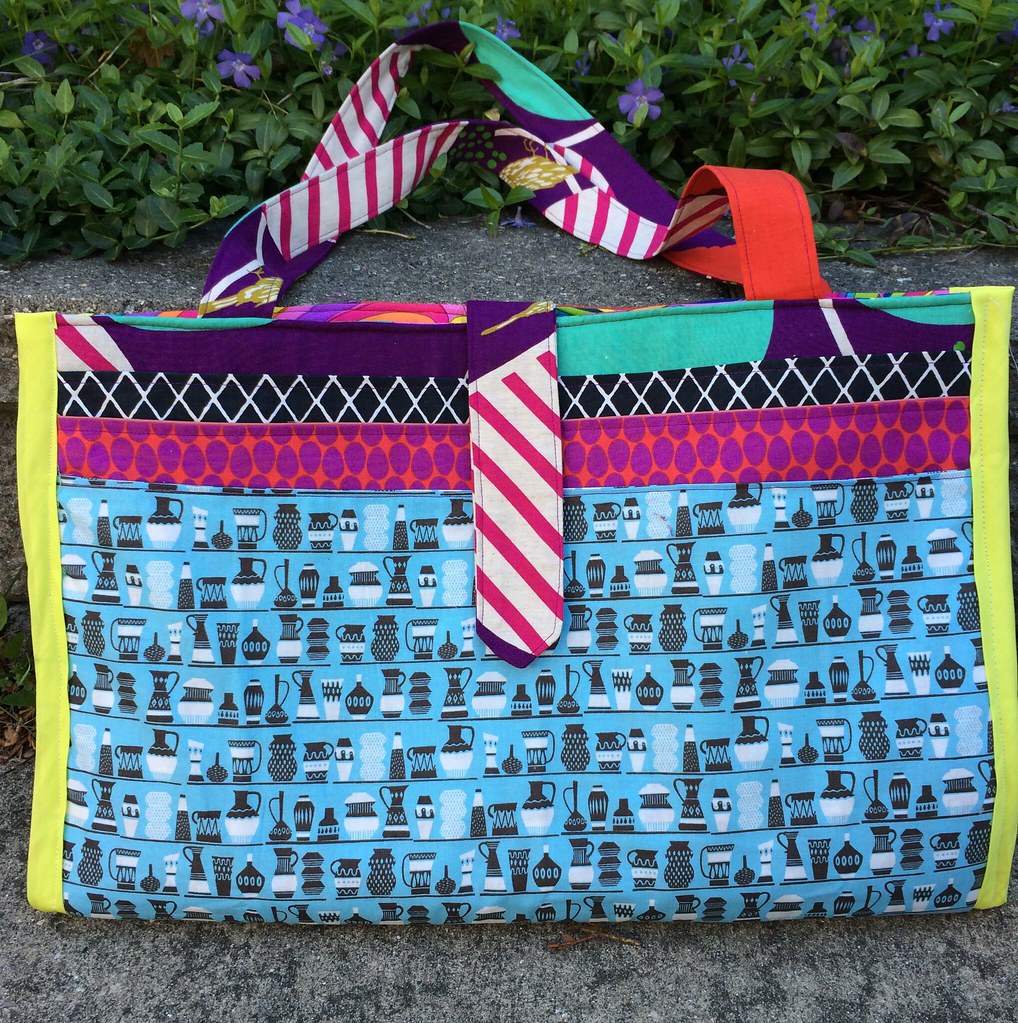
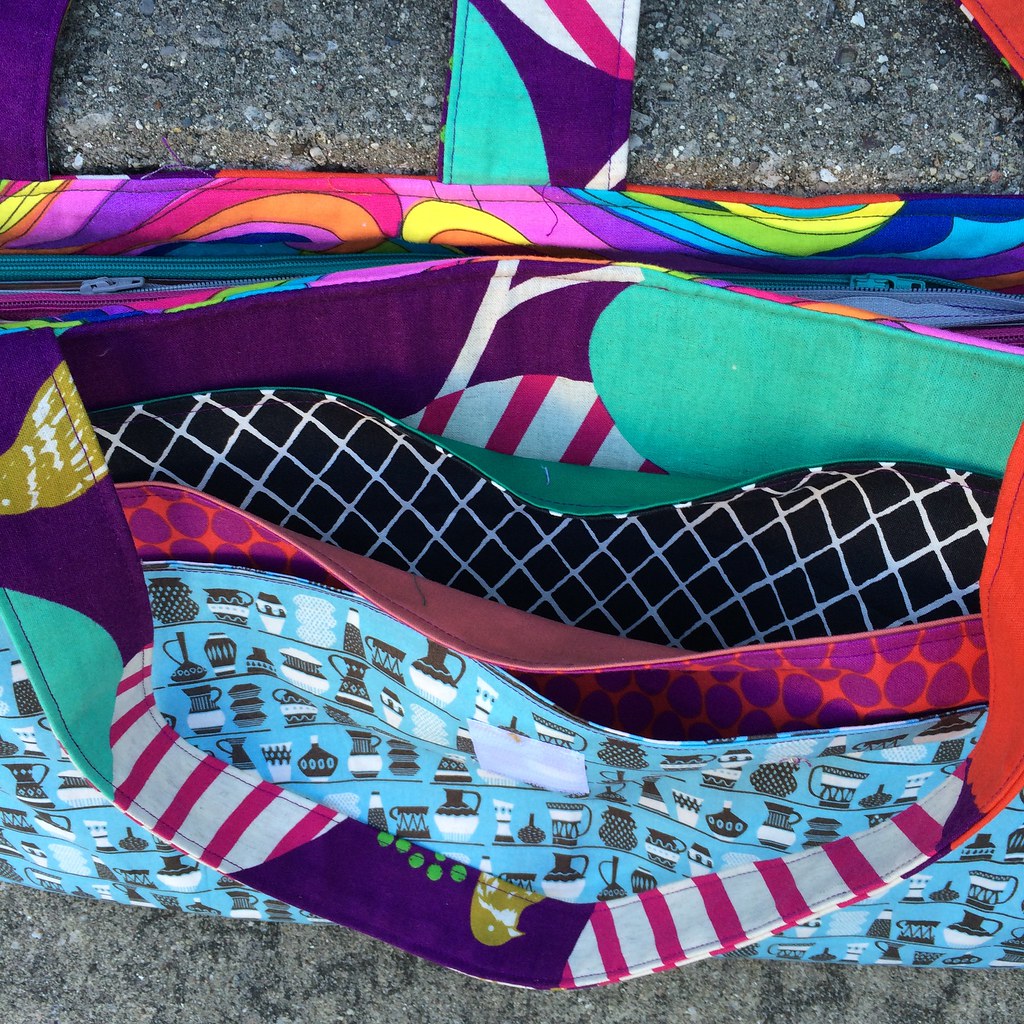
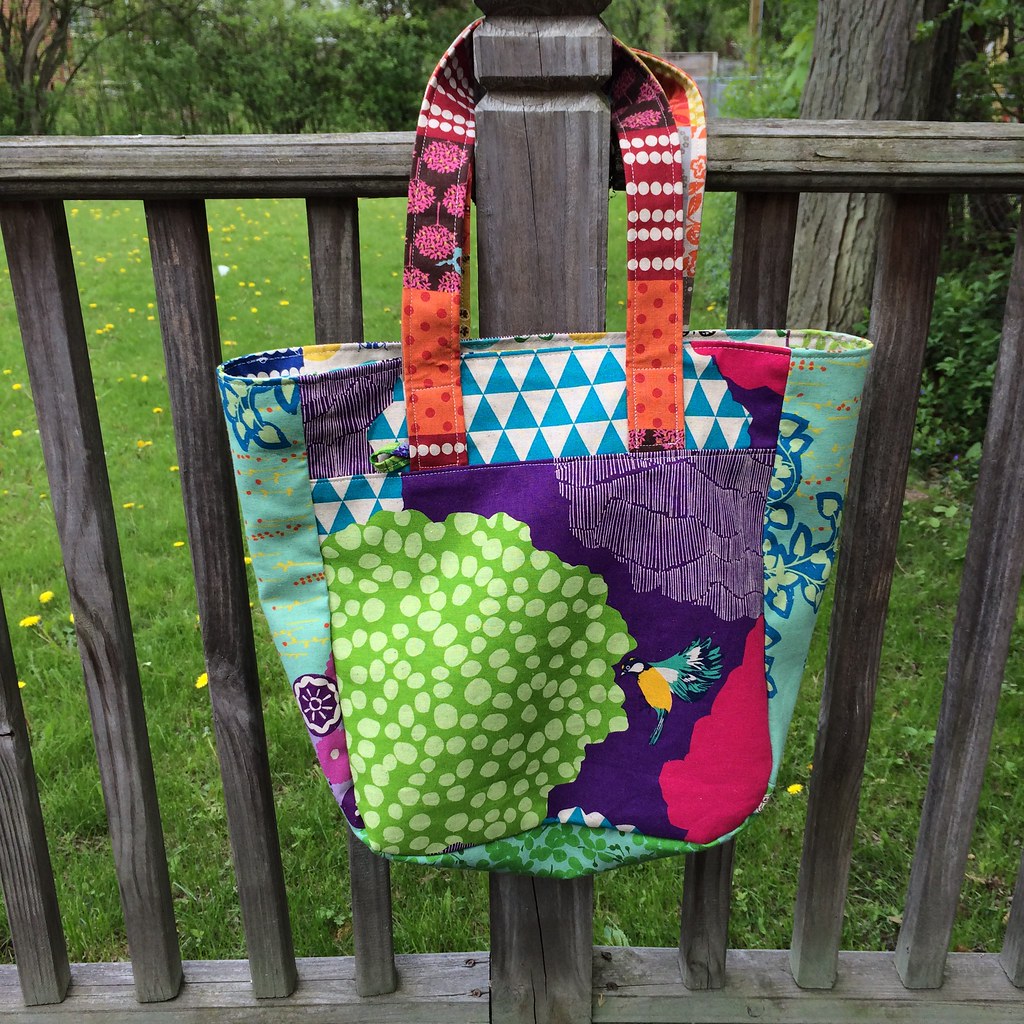
I tried out several combinations of linen fabrics (I, um, have a lot of echino in my stash), before settling on Kalmia as the focal print. Because the scale of the print is massive, something the size of a super tote is a really great choice for it. I considered solids for the gusset and handles, but my desire to use the prints overwhelmed me.

The blue on the gusset and the orange patchwork for the handles are both scraps left over after making pillows for my Echino windowseat.


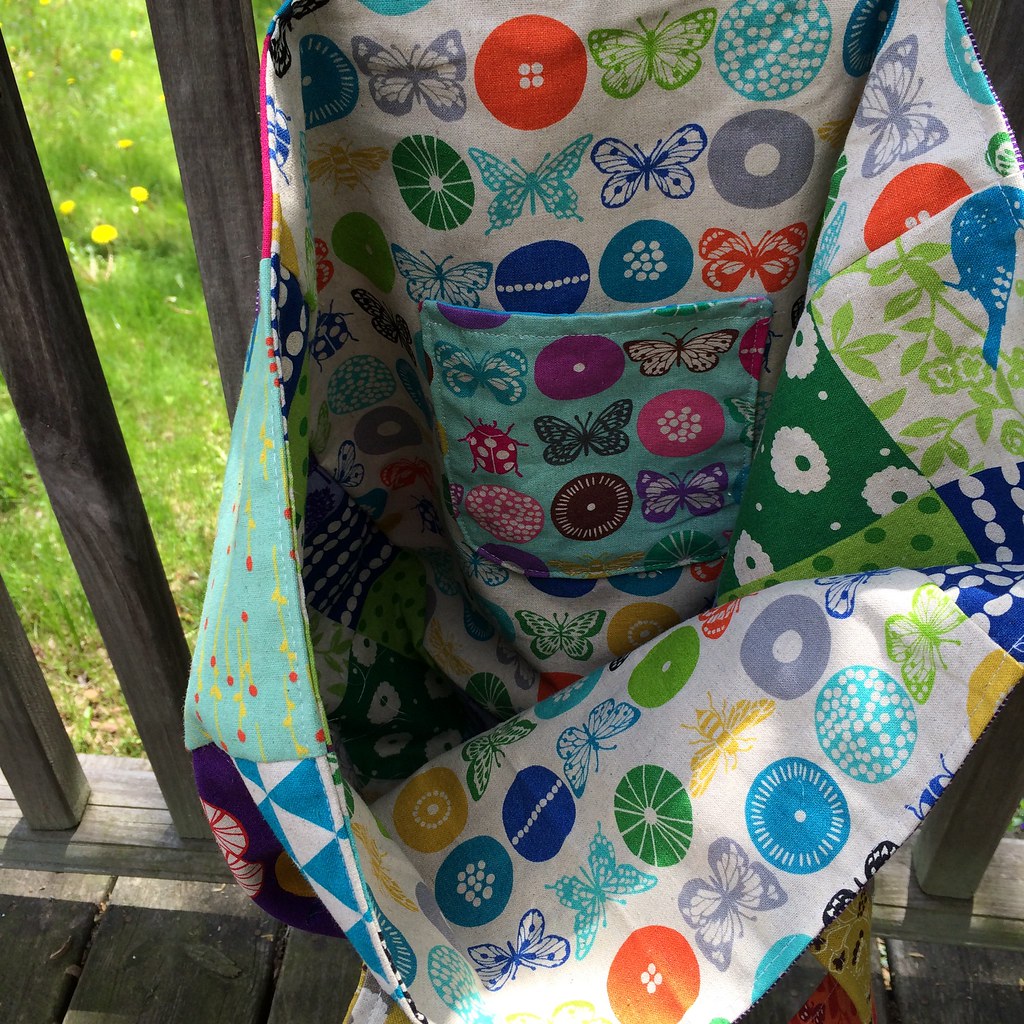
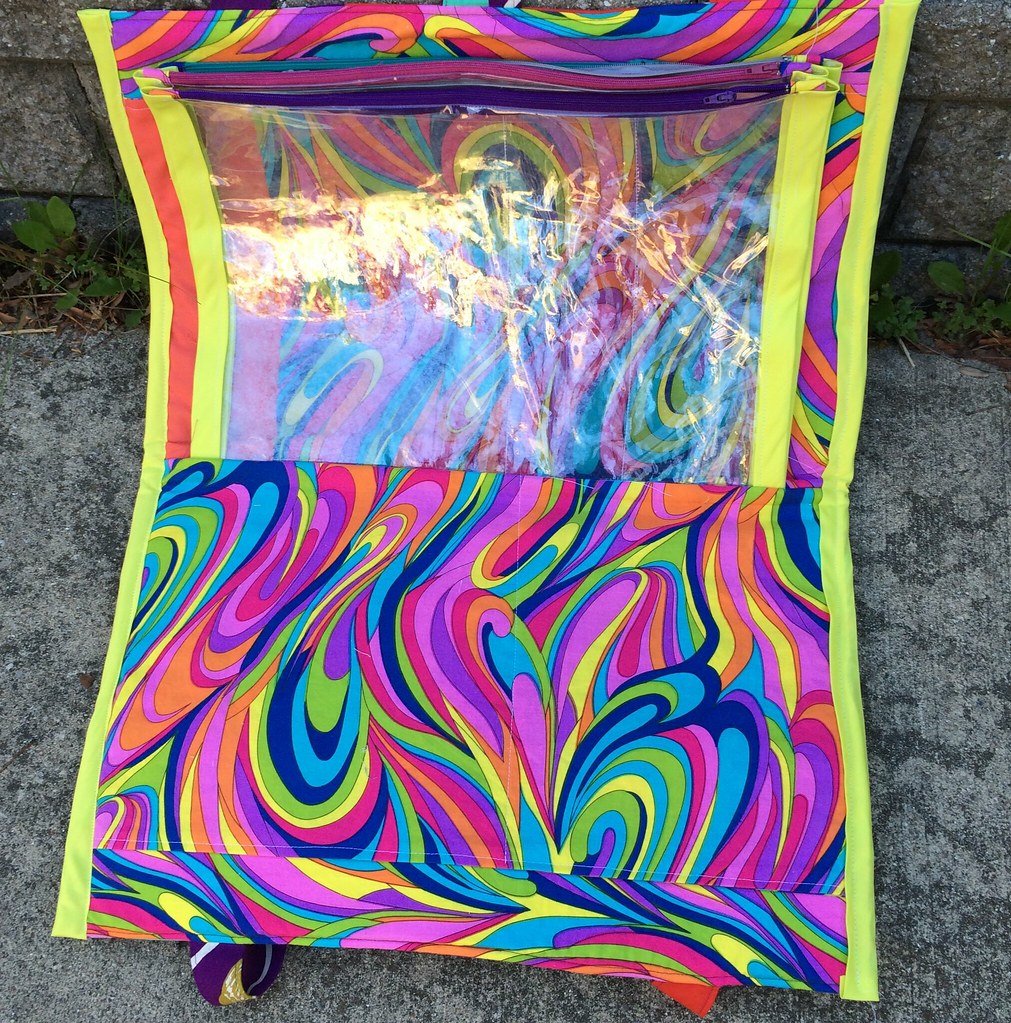
The inside is insects, and the lining gusset is fabric leftover from the window seat itself. We had someone make the cushion, but they had to promise to give me all the scraps when it was done! I don't think the library bag needs a pocket per say, but having found a scrap of the blue, I couldn't resist putting the two colorways together. The inside of the pocket is this lovely print from Lotus Pond. Which matches really well with the natural insect print. I'm thinking about pairing them again, in another bag.

I love these bugs!
I skipped the gusset dart, magnetic strap and/or zipper, outer pocket... It's a really stripped down version. It needs only to hold a lot of books for a short period of time, repeatedly.

I reinforced all the bottom seams, by sewing them twice. (so the turn out open section is on one of the side seams rather than the bottom). I added interfacing to the straps, and cut it to be about 2/3 the size of the strap, so it's sewed into the seams. But, I think being home dec style linen inside and out, it's a pretty sturdy creature. The outer gusset is also a single piece, so no seam on the bottom to wear out.

And if I need to replace it, I've lots of echino left to draw upon, right?

See my super totes of the past: castle bag, super bright super tote

Sunday, May 18, 2014

A tale of two sewing machines... and what it takes to make one bag

So, when I was at Camp Stitchalot Spring, we had two classes, one on Kirstin Link's tackle bag, and one on the Camp Stitchalot bag by Sara Lawson of Sew Sweetness.

And then I mentioned I hadn't finished it, but I was close. And then.... well, nothing.

Now, let me tell you what really happened to my Camp Stitchalot Bag.

When I went to camp, I took with me the same machine I always take, my Pfaff Ambition 1.0 (Um, not to sound ominous, but... just to be clear, although I use this machine for almost everything, I'm not actually recommending it. I like that it has a big throat, and it has some other great features, but there are definitely things I don't like about it, too.)

Making the butterfly dress!
As you can probably tell, it is a huge electronic beast. It has things I use all the time, like needle down and the needle threader. It's got a drop in bobbin, which is amazingly easy! But, not so awesome, it won't run without the foot dropped, and shuts down when it's brain gets overloaded.

Which is why I never finished my bag at camp. When I got to the step towards the end where you have eight layers of vinyl to secure to the lining, the Pfaff would just balk and throw up an error screen. Time after time! Until I just put it away.

So, I said, well, when I get home, I'll put this through my mechanical machine, and see what it makes of it.

But, I didn't. I put it aside. And because it's so large, it didn't even make it into the WIP pile! It was sitting under the ironing table. Where it may have lived undisturbed for ages, except that I have never had my Pfaff cleaned (I've had it two months shy of two years), and having just finished some big quilts I wanted it all cleaned out and ready for the next Camp Stitchalot in a few weeks.

When I started doing the straight line quilting for One Third Street Neighborhood, that seemed a good time to get the Pfaff to the shop. Because one of the things I don't like so much about it is that integrated walking foot. (Actually, it's great for many things, like putting on binding. And I use it a lot, but it's not great for straight line quilting.) I do all my straightline quilting on my old Janome, with its proper massive walking foot:


Now, this machine is seriously nothing special, it's the least expensive machine you could get in a quilt shop ten years ago. But I used it for years and years, and when I got the new machine (that of course was going to do everything better!) I still held on to it, thinking, well, I could use it for classes...?

But it's not a good machine for classes, because I need the luxuries I'm used to, like needle down! But what it is good for, apart from straight line quilting, is punching through where another machine fears to tread.
It has no computer to confuse. You put your foot down on the pedal and the needle goes.

Enter the Camp Stitchalot bag!

Actually, after my Pfaff went to the shop, I tried piecing a quilt on the Janome, but it's just not... right, I don't know how to explain it, though I suspect there is some issue with the feed dogs - I'm ending up having to unpick the occasional seam where the fabric had slid to the right unexpectedly. So, I was casting about for a thing I could do with this machine, when it occurred to me that the bag was right there, 80% assembled, and I may as well shove it through and see what happened. And it worked, well, after a few moments where I had to be very hands on. But, a short time later, I had it finished!

front

inside - I found this amazing fabric at the thrift store, you may recognize it from this quilt!
back!
The only thing I altered significantly is that I used larger binding tape than called for (but I probably would use the recommended size if I were to do it again.) And my pockets are lined in the back with solid fabrics, rather than using up my precious prints. (Also, I miscut part of the interior lining, so it has a design feature - a coral stripe!)

This bag... is a huge undertaking. Mostly it's just huge. I had to clear off my sewing table, or risk the bag pushing stuff on to the floor.


And now, it'll be a nearly week until my Pfaff comes back to me (I don't know why they need it so long? Maybe everyone who has been putting off servicing their machines over this long winter is finally taking them in? Maybe due to Quilt Market?) so I'll have to come up with something to do in the meantime, as I don't want to piece with my Janome. Cutting out a quilt? Making some clothes with my serger? Making another Super Tote? All things that I am considering... and more! (Catching up on my blogging, perhaps?)

Sunday, May 11, 2014

One Third Street Neighborhood - for Sew Solid Sunday!

I'm really excited I finished this (mostly) in order to get it up today. I was stitching the binding on this morning, so it was a close run thing.


Presenting One Third Street Neighborhood! (Not #1 Third Street, but 1/3 Street!) I have long admired Debbie Grifka's adorable Third Street Neighborhood pattern. But I wanted many more houses (so I could do three layers of color) in less space (because I love tiny pieces). Her large version (20 houses) is a lap sized quilt. My version has 32(?) houses and is 26"x30".


So, how did I make the quilt?

 Step one - I bought the pattern. I also asked permission to blog about it, because I knew I would be doing something a bit radical to it. Debbie graciously agreed!

Step two - I studied the pattern, drew out the block, and used Adobe Illustrator to build the house block as it was written (without seam allowances), then shrank it down to about 1/3 the size, then added back the seam allowances.

Step three - paper piecing all the houses. Because I had three rows, I did darker houses, medium houses, and light houses, because I wanted to go light to dark.

Step four - using the pattern as a reference, I began to place houses. I have more houses than the pattern though, so for some of them, I had to extrapolate from the pattern.

Step five - filling in the blank blocks. This took a long time. This quilt was hung on the design wall for a few weeks, where every now and then I would look at it, and move things around. I didn't want colors touching themselves, or colors that were too similar. I ended up adding in a few more purples and that deep burgundy at the last minute, and several colors were banished (red, white, and a certain shade of pink). Most of the colors I used are leftovers from other projects, or fabrics I had hanging around. Nothing was specifically bought for this quilt.

Step six - assembly. I decided not to worry that they don't line up. Because they don't. And it would have taken too long to figure out why.


Step seven -  the back! I did stripes in some of the colors from the quilt. One's I had a lot of, mostly. There was supposed to be a cream stripe too, but clearly I miscalculated the size I needed, and it all got cut off. I sliced the assembled stripes partway through and offset it so that it would be more interesting. Then I basted it, realized I never put my tag on it, removed the basting, and added the tag, and then basted it again.

Step eight - quilting! I went with threads of different colors in straight line quilting across the quilt. I used my Janome and it's walking foot. I thought this was the best way to get dark colors down at the dark side, and light colors at the top. I did cheat and use poly thread for many of the lines, because the two quilting stores I went to only had a few shades of 40 weight thread between them, and while I know the other local quilting store would have been better stocked, I was trying to finish for today. It's a wall hanging, we'll survive...

Step nine - binding! I chose an RJR solid in Golden Topaz, because I believe (like denim blue and most shade of green) that mustard yellow goes with everything. And I had some leftover from another quilt. I hand stitched it, mostly because my Pfaff is in the shop for cleaning, and my Janome doesn't have anything fancier than a zigzag stitch.

And all that's left now is to stitch down the hanging sleeve.

As for the extra houses (I made 36), I made a double sided pin cushion from two of them, inspired by the Ann Arbor MQG's recent pincushion swap. I'm not entirely sure it won't explode, it's so stuffed.

The picture of the other side was not so great.
Linking up to Sew Solid Sunday!

Monday, May 5, 2014

Ice Cream dress!

Last night, I put the button on the Ice Cream dress. The final step.


This dress was a journey. I bought that tulip fabric for a dress for my kid almost a year ago now, at a quilt shop when I was in Texas. And washed it and put it in a drawer (a drawer full of fabric intended to be made into clothes...)

Then, recently, I was at Pink Castle Fabrics, and I saw this Minny Muu print with tulips! and ladybugs! and knew they were meant to be together.

I chose the Oliver + S ice cream dress because it's adorable on a little girl, and my little girl isn't going to be little much longer, so I had to get this one done now. I have to admit, though, the pattern is a challenge, and not something I'd recommend for a novice. The construction is unusual to say the least. And the directions could use more illustrations. It's not difficult, exactly, it's just not particularly intuitive.

I myself, attached the yolk to the bodice in three completely different, entirely wrong ways, before finally hitting on the correct way. Though admittedly I'm not a genius at following directions. Yesterday was a long day full of ripping seams out and swearing.

But, it's finally done! And I still want to make view B, the gradient one, so I don't totally hate the pattern. (There are not many out there that I can show by way of example, but there's a gorgeous one at the bottom of this post by Kristin of Skirt as Top. In shot cottons! I want to do shot cottons, too. I love the way they look so soft!)

Oh! And I made two mods - I put some shapeflex interfacing under the cut out in the yoke, as it tended to want to wrinkle.  And I stitched the back of the yoke together at the base, to protect the fabric in the second layer - this was advice I got from Samantha of Making Life Prettier - her ice cream dress - just adorable! - is here.