-->

Sunday, August 30, 2015

Sandbars, a modern baby quilt

I was casting around for a quilt to post today, and having the binding half done on this one, I decided to finish it up and blog it!

Then I realized that I'd have to wash it first, because I used a soluble graphite pencil to mark the lines to quilt in, but still managed to wrestle it through the process in time to take pictures before late afternoon, so yay!


I call it Sandbars, as you may have already surmised. I designed it in response to a thought I'd had during a guild meeting. We have a charity quilt drive, I expect most of the guilds do, where we donate baby quilts to the local Children's Hospital. (We also have a drive for wheelchair quilts for the local VA hospital, but I digress...) The baby quilts that appear in meetings are fun and pretty, but not, as a whole, very modern- which let me stress is fine, and also the one I did before was seriously not at all modern, so I'm not trying to start fights, just explaining why I made this particular quilt the way I did. (Also there have been some amazing recent donations; I designed this in March, fresh out of QuiltCon, and maybe other people have been having the same thought.)

And I tried to design a very modern baby quilt, yet one that still said baby.


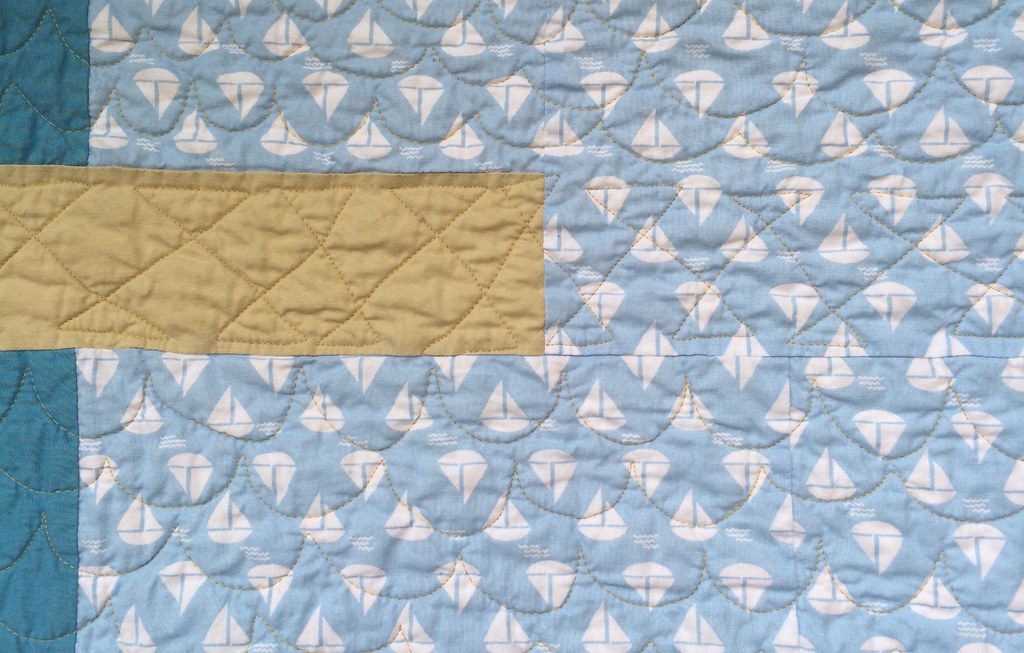
Here is my sketch book page, I was very enamored of lines, but I simplified it from the first draft, and added a third color. Two solids and one print.

I'm sure it would have stayed just an idea, but I got pretty sick right after Easter, too sick for work, not quite sick enough to just zone out, but too sick to concentrate on sewing curves and paper piecing, which were my ongoing projects at the time (still are! Oops....) So, this being a very straightforward quilt to assemble, I put it together, and when I started basting all my unquilted tops in July, it got basted too.


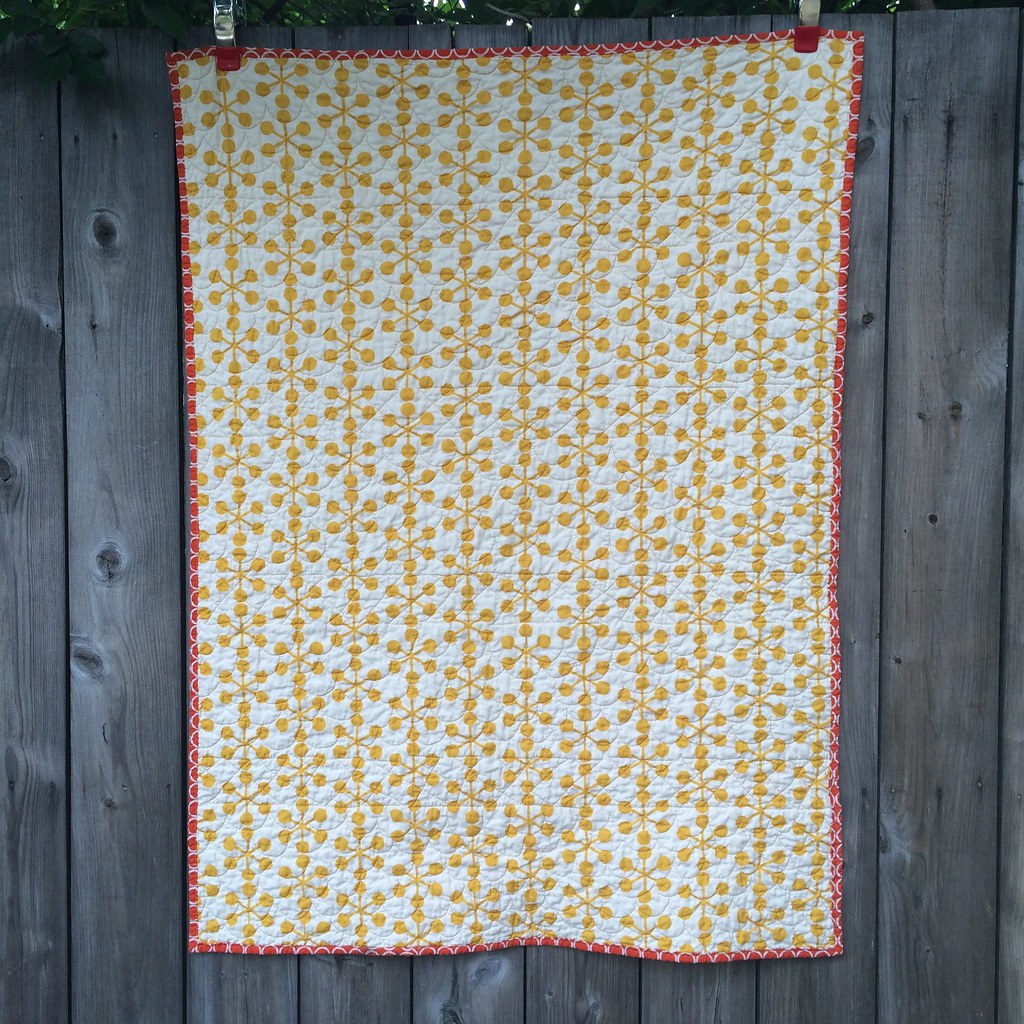
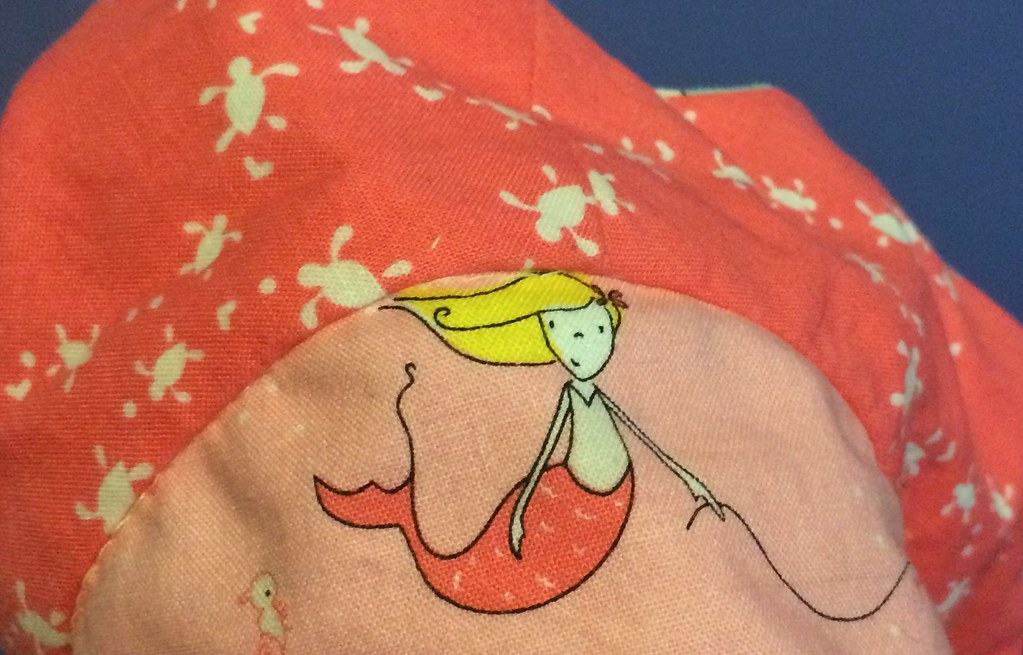
I backed it with this most awesome print from Comma.

I quilted it with upside down clamshells to make waves, and the walking diamond from Angela Walter's first book. And used one of the quilting techniques she suggested, extending the quilting past the shape, so that the waves and the bars form a series of lines down the length of the quilt.


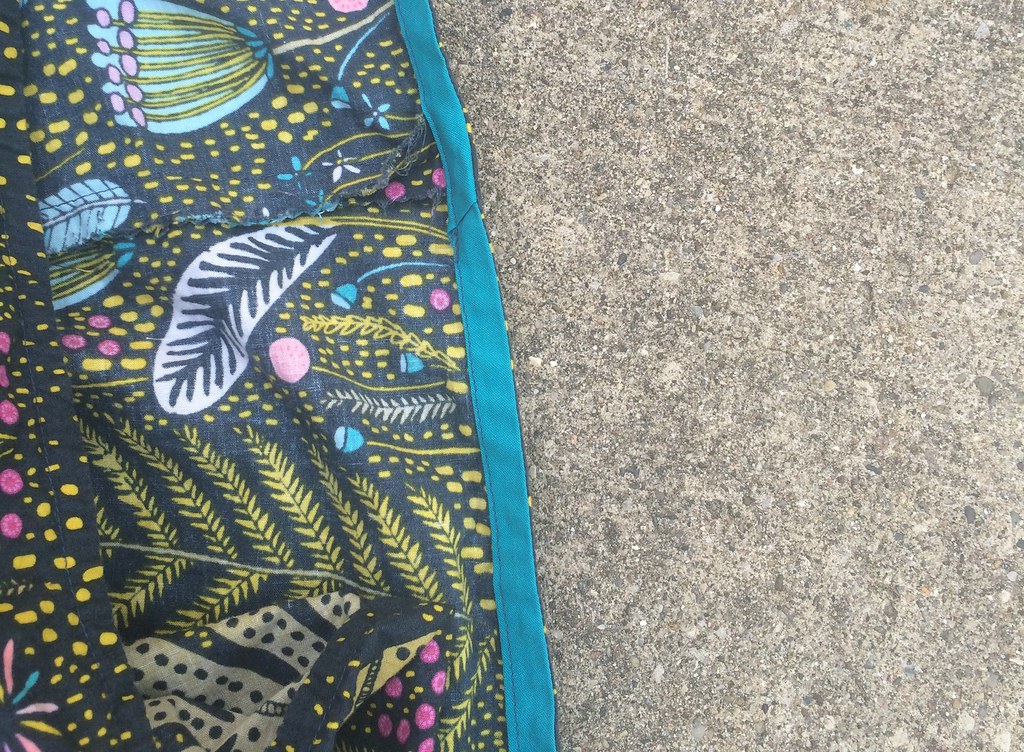
The binding is another really great graphic print, from Robert Kaufman's Metro Living line. It's machine attached, though I did it upside down, so it worked surprisingly well, all things considered. (When you attach a binding to hand bind, you sew it on the front and attach it to the back at your leisure. With a machine binding, though there are other ways, generally, you attach it to the back, and top stitch from the front so that if the stitching wanders, it's on the back where it's less noticeable.)

I've been quilting all week, so I have a few more to bind. And a few more to quilt, too! Then I'd probably better see about that long neglected paper piecing project, as I'm hoping to submit that one for the next QuiltCon!

Sunday, August 23, 2015

The Week of Apparel Sewing, part two


As mentioned in last week's post, I spent a week at the beach, sewing garments. Now I will show you the long planned dresses.

Cinderberry Stitches's newest line, Salt Water came around the time that I was making those first few Flip Flop Dresses in May, and as my daughter has kind of an obsession with mermaids and dresses, so they were an obvious match made in heaven. So, I bought three prints for the dress, and several more for my stash, because adorable! And then it hung around for weeks, until I dropped it into the pile of projects to take on vacation.


This is the least embellished of all the Flip Flop dresses I've made (no pockets! no bows! no contrast hem!), but I went with the contrast sleeves to relate the bodice more to the skirt. It looks, well, a bit plain. I really like the print, but it doesn't carry off the large space so well.

Obligatory sleeve close up:


I'm sure you are wondering now what color this dress really is. The bottom photo is much closer to real life than the top. It's a corally bodice with a pale pink skirt.

After I made the border print dress that I wore at quiltcon, I've been scrutinizing border prints for their suitability for the pattern. Many aren't quite right, either printed half way and then reversed, or they are long gone (ie that amazing print from Nordika that I would so make a dress of if I could locate 2.5 yards of it in teal.) But I did come across an equally awesome one this spring, from Sarah Watson's Biology line for Cloud9. And did nothing with it for a long time, and I had left the pattern pieces out on my desk, where they got ripped and scattered, and somehow, by cleaning off my whole desk (for once!) I managed to track them down, and the instructions, but not the envelope and not the rest of the pattern, which is sort of a problem, because I used the wrong sized skirt, and had to guess where I should add in extra pleats to get the thing to fit the bodice. Oh well.


Also, this is the one project I had to run out and get things for, because I had forgotten the bias binding tape to finish the armholes!

But I also ended up using that on the hem, after discussing options about hems on Instagram. The pattern runs from selvage to selvage, and I didn't want to obscure the flowers by folding up the bottom few inches. So, I sewed it to the bias tape, and folded that up, and sewed the other side down.


In addition, I didn't like the options I'd brought for the pockets, so I drove over to So South Haven, and they had this Oliver and S print that was perfect!


Then... the bad news is that the interfacing I used, pellon's SF101, shrunk in the wash, and now the midriff band (and the neckline facing) has a weird puckered texture. Apparently, one is supposed to prewash this stuff (warm water, hang dry...) but I didn't have an issue with the other dress, so, I was just floored at the issue. I have been pointed to Fashion Sewing Supply as a place to buy interfacing that is not prone to shrinkage. Which I will try when I've recovered from this disappointment.

Anyway, I can still squeeze into the dress:


But I may remake the bodice (or at least, remove, remake, and reapply facings and midriff). With different interfacing. I have quite a bit of fabric left, because I was cutting a different way then the layout diagram suggested, so I bought an extra yard in case I needed it. And I guess I might, but I'm not ready to go back and fix it yet. The disappointment is still too raw.

In the intervening week I have finished up another quilt top, so I now have eight to quilt, but at least only one of those needs to be basted first. So, hopefully, you'll be seeing quilts in this space soon!

Sunday, August 16, 2015

The Week of Apparel Sewing, part one; leftovers

Last week I went on vacation with my family,  and I of course brought my sewing machine (actually I brought two, in case anyone had the urge to join in) and I brought several apparel projects because unlike quilts, they are fairly self contained; only the fabric, interfacing, fastenings, thread, and patterns, oh wait that sounds like a lot! but with quilts, it's all that (except the fastenings) and much more of it. And it requires space to lay things out, which one is not always assured on a family vacation.

So, in the mornings, we went off to the beach, and after lunch, I sewed. And also after dinner! And also after the kids were in bed.

I made two dresses for a child, two pairs of pants for the other child, a dress for me, and revamped a skirt I'd made earlier and made shorts from knit fabric, which was a first for me. And I didn't even get to all the projects I brought. (And I only had to run out once, for single fold binding tape.)

But first, let's talk about leftovers, by which I mean, I guess, two things.

You buy a yard of knit fabric to make a pair of pants, say:


The pants require four long columns of fabric, and the waistband is cut from the remainder.  And what do you do with that square of fabric left over? I guess I've been saving them for I don't know what, but here's an idea:


Tiny shorts for a smaller sibling? And unlike pants there's no horribly long side seams, so they take very little time. The only issue is that one side has to be cut upside down because of how little fabric there is, but what of that?

I worked these up from a Simplicity pattern for woven shorts for wearing under dresses (the idea of which makes  me vaguely upset, but anyway) but it's another case of adding fabric to the bottom and shortening the rise, and the waistband is altered completely, so there is very little point in pointing anyone to the pattern. Just as I'm not going to talk about my pants pattern, though it is a knit pants pattern from Maccalls, with the rise shortened, and the waistband altered, and the bells and whistles all left off.

I kind of like the fabric to do the talking, not the extra stuff.


This is my second wearable muslin for the shorts, the first being large enough for my older child.  But, hey, still wearable! And it uses very little fabric, on account of the fabric being stretchy and the subject being tiny.

The other kind of leftover is the perennial favorite, the fabric shop remnant. My local quilt shop, Pink Castle Fabrics, had a sale on their apparel remnants, which sit on a shelf near the cutting table. I looked through one day and found three pieces of this Cotton + Steel print in two colorways. So, I conceived this Flip Flop dress to use them. The long skinny remnant became the contrast hem, the skirt was cut from the larger blue piece, in a 30" column (then split in half), the bodice was cut out laying sideways (thankfully it was not a directional print!) and the larger red violet piece provided both the bow/sash and the bodice lining. And it's cotton lawn, so it looks fancy but feels super soft.


I'm probably going to skip over showing you every pair of pants and shorts (though you can see them in my instagram feed), but I've been taking pictures of dresses today, so you'll see those up soon! The skirt has it's own saga, so it may get it's own post, or maybe not. Maybe I will finish a quilt sometime soon instead!