-->

Sunday, May 24, 2015

The Flip Flop Dress! Dresses

I got a chance to pattern test a little girl dress for Deborah Moebes of Whipstitch and of course I was like, yes, totally! And I just happen to have a little girl who likes dresses handy.


I also have a large stash of fabric, much of it bought with the vague thought that one day it should become a dress.

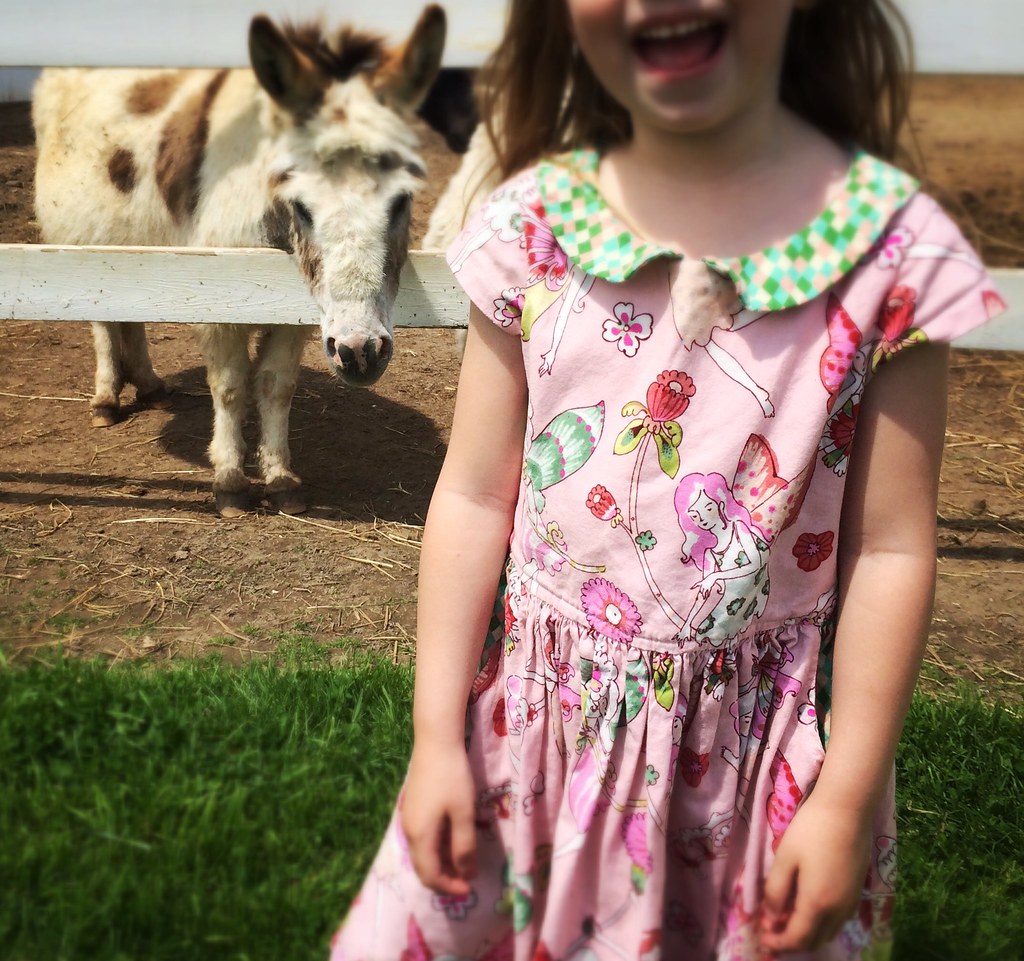
This is the Flip Flop Dress. It is a classic dress in a chose your own adventure style, with two styles of sleeves (or you can go sleeveless), two styles of collar (or you can go collarless) and a choice between putting the buttons on the front or the back of the bodice. And for someone who tries to keep the kid covered up in the summer (fair skin + lots of time outside = sunburn... if we're not careful) it's awesome. (But I will leave my rant against the impractical clothing the stores are trying to sell us for another time...)

My first one had several bells and whistles, Peter Pan collar and cap sleeves. I also added pockets a la Made by Rae's Made to Measure skirt (not available as a pattern, but as a class.)


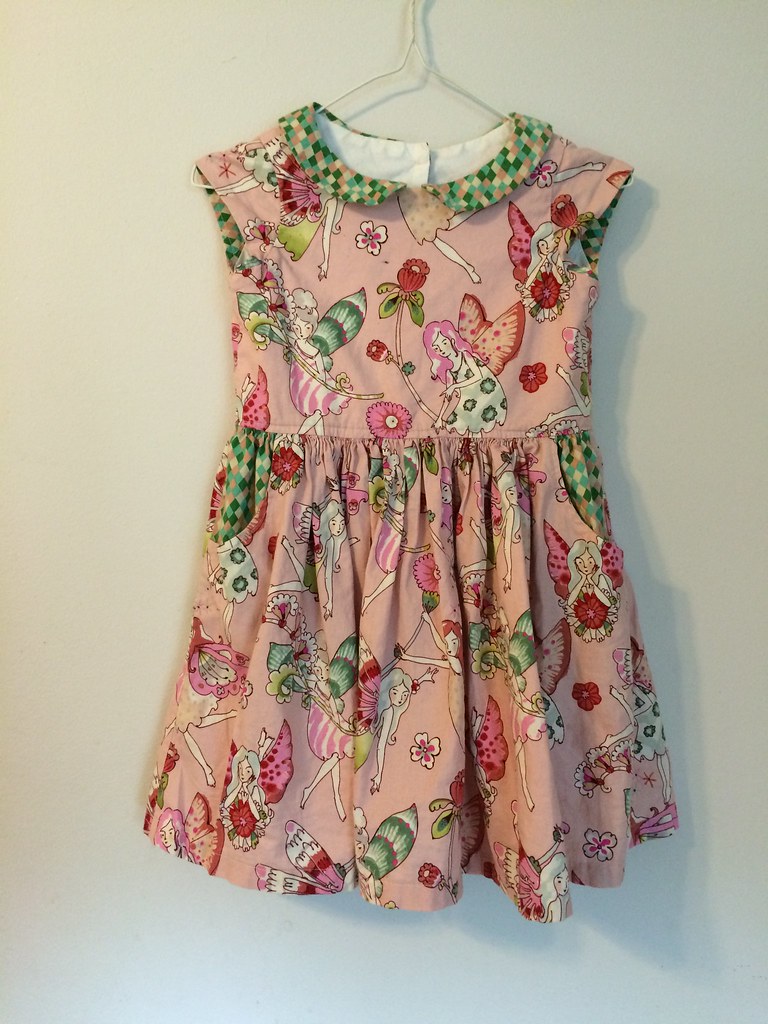
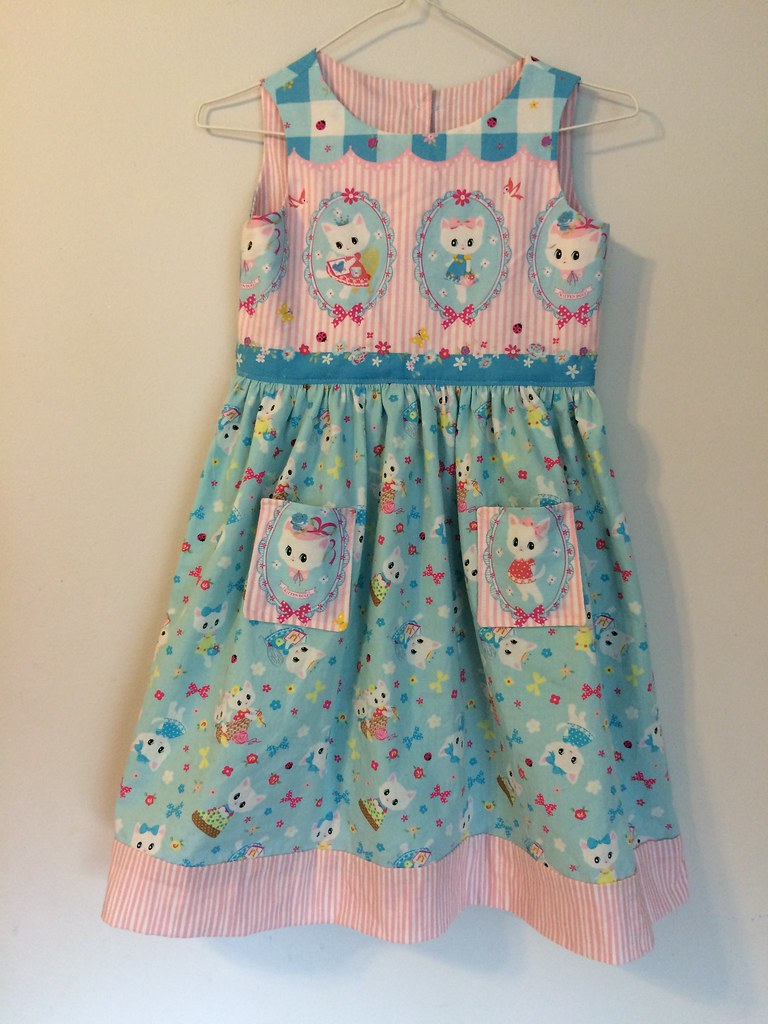
I really enjoyed making this dress, and the way it turned out, and then I made some more. Employing some Japanese kitten fabric I was (am) obsessed with, called Kitten Doll Baby. Because what I really like about this pattern is the larger bodice (compared with, say, the Geranium) really allows you to feature some larger prints.

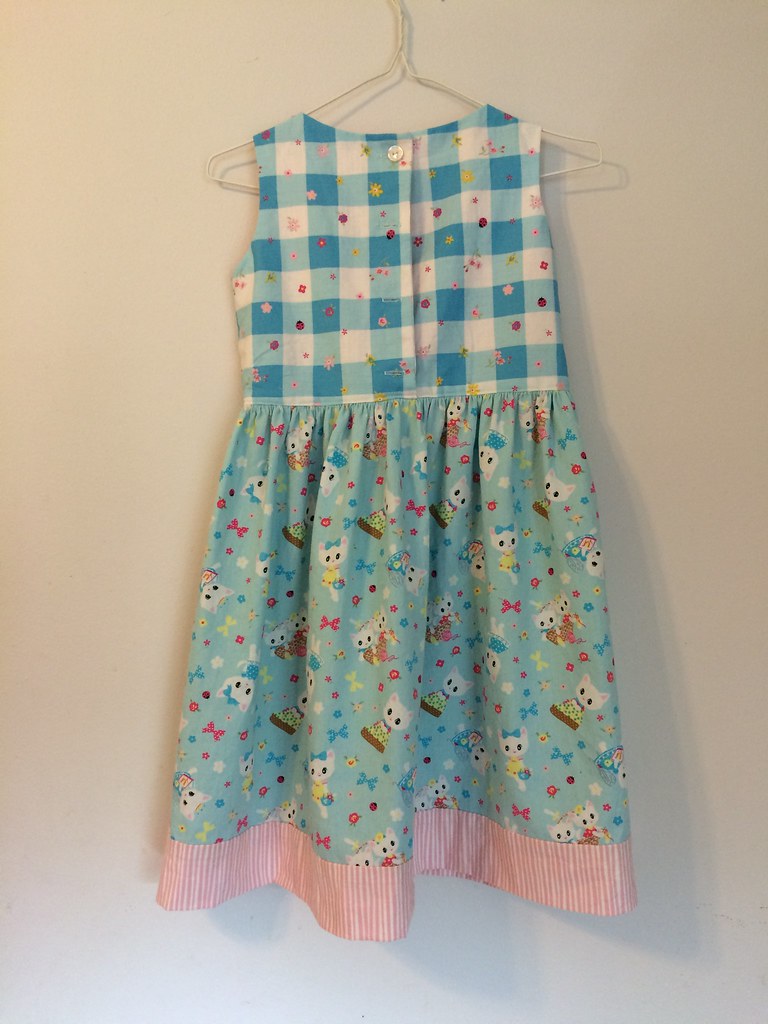
This is the cutest dress in the world, and I matched the pink stripe with a pink stripe in my stash. This border print made a fun bodice, while the other side became some rectangular pockets. The contrast stripe on the bottom I made using the burrito method (as for pillowcases), -I used a 6" piece of fabric for a 2.5" contrast stripe- and it worked fine, though there were moments turning it right side out where I questioned my sanity. The back of the bodice is the center of the border print.


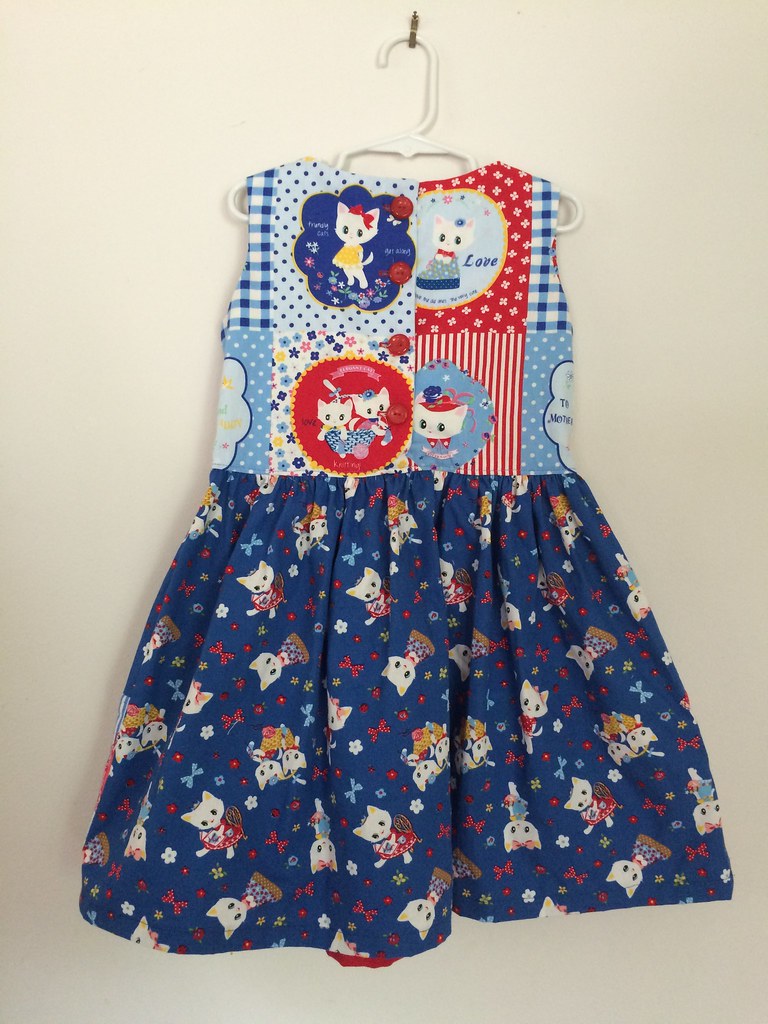
For the last (so far, though there is another panel print from this line that I just adore) I used three prints in one colorway, the panel, the toss in the dark blue, and corresponding border print. (And leftover tossed kittens from the other dress to line the bodice.) I spent a long time trying to decide how best to feature 3 fabrics, and this was my solution. (I did consider a collar, but I decided that the pattern on the fabric was too big and busy, and that simpler would be better.)


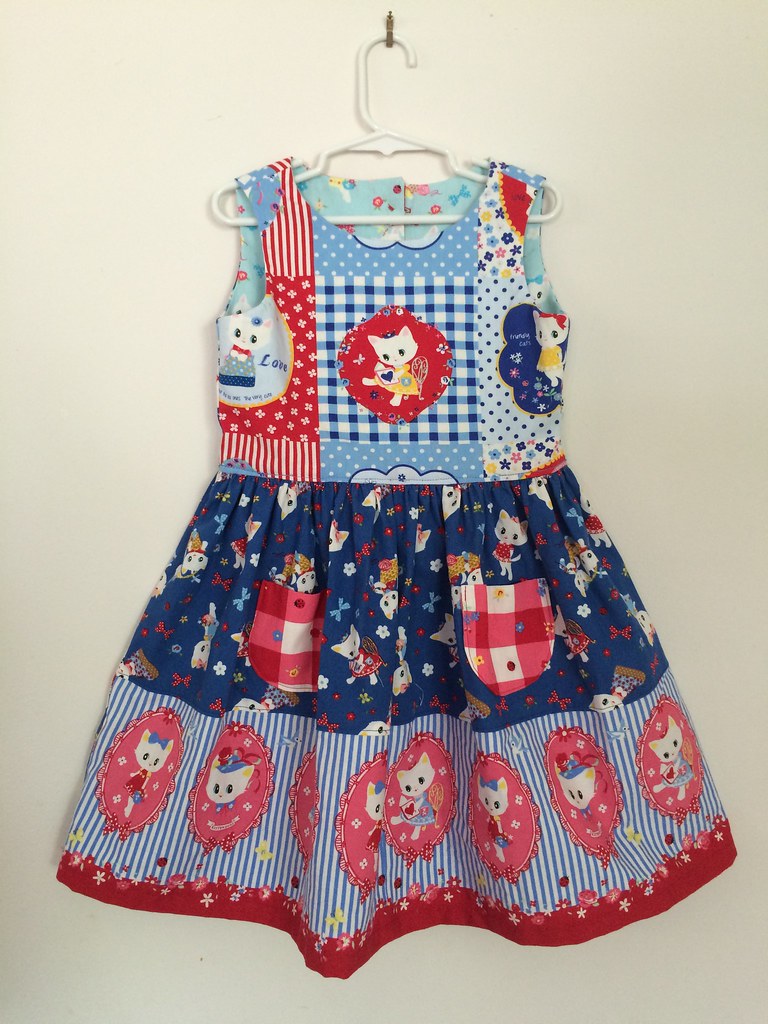
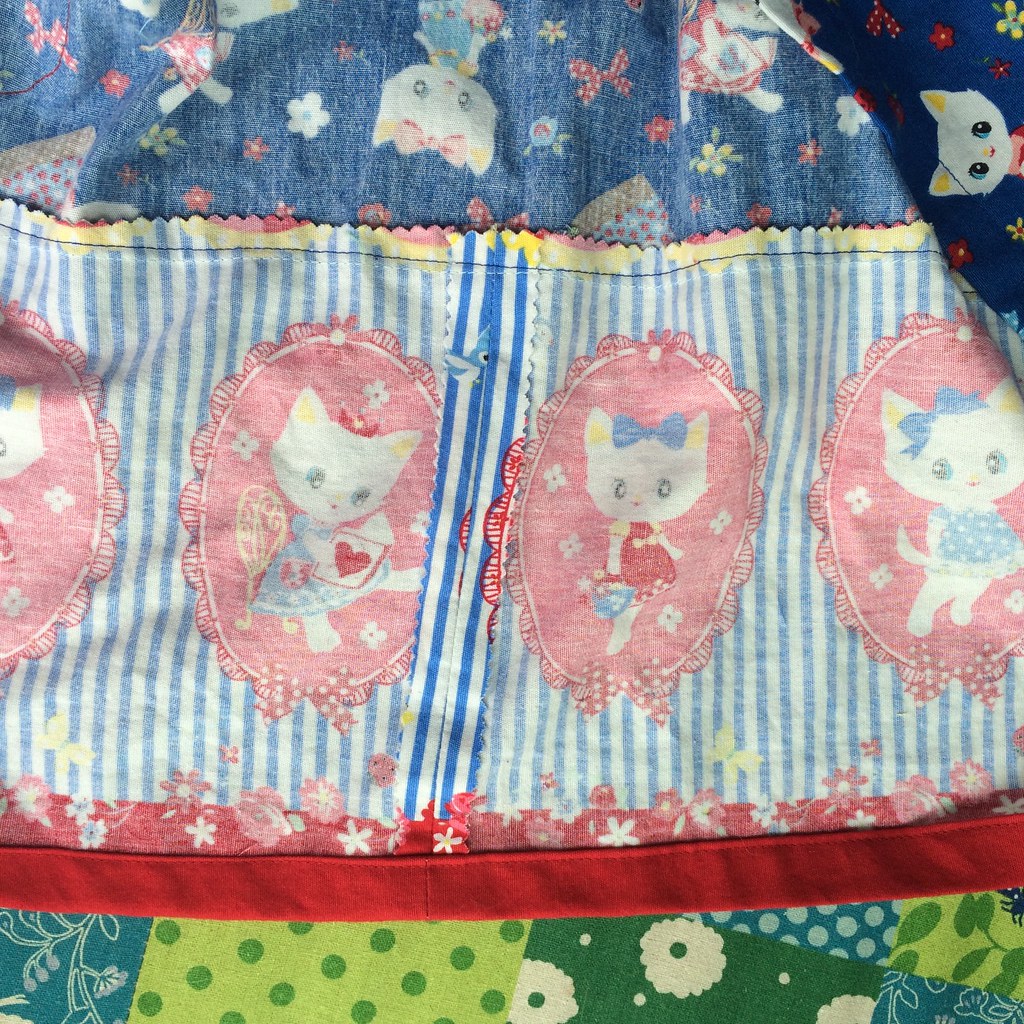
For this one, I sewed the two border prints together, because I only had a half yard of the border print (18" and I needed about 30" for the skirt), and sewed that to the toss to make up the length of the skirt. I didn't match up the kittens as well as I'd hoped, they are not exactly the same side to side, I discovered! Also, I didn't want to lose anyone, so we compromised. I did run another row of stitching at the horizontal join; I've made a dress with a contrast band before and it was a frequent visitor to the mending pile, until I wised up and reinforced it.


The back of the skirt is just blue tossed kittens. Also I added pockets (these are from the Geranium dress pattern, speaking of Geranium) which use the calico from the border print. And the buttons are vintage ones I got in a lot off of Ebay in frustration that I had no matching buttons in my stash. (the pink dress has buttons that are the same size and color as each other, but not matching... embarrassing but true!)

Will I be making more Flip Flop dresses? Absolutely. I may even try the buttons in the front one day.

Tuesday, May 5, 2015

Sitting Pinny Armchair Pincushion (with tutorial!)

The Ann Arbor Modern Quilt Guild has a few swaps at guild meetings, and last month it was a pincushion swap!

There were so many amazing pincushions.

I made an armchair from Tsuru's feather print, and matching pillows from one of the line's coordinating prints.


I made an armchair, because while I had several ideas not involving armchairs, I kept pinning armchairs. And that one crab, I guess. Anyway, although there are tutorials out there, I made my own without looking at them, and then I made some more that make more sense, and that's what I will be sharing with you!

I think you never really know a thing until you've made it three times and have explored many possible downfalls and dead ends... 


There is a pdf available (for the nominal fee of $1) at my Etsy shop. Or, scroll on...

Sunday, May 3, 2015

On English Paper Piecing, and things not going as planned

So, here is a recap of my week- on Tuesday, I was reminding my husband that I would be taking a screenprinting class starting in two weeks which would run all summer, missing dinner two days a week, and enough work that I would have to start making it up on the weekends. Then on Wednesday I got a call from the college telling me the class was cancelled due to low enrollment. That was first thing in the morning. I went through the day thinking, now what?

Everything was planned around this class, vacations, doctor appointments. I was working on finishing up two minis so that I could start this class without any deadlines. I forwent Dress Camp because of worries that with class it would be too much and now it is sold out. (Okay I can't think of any more examples, I am really bad at planning ahead...)

So, what is a disappointed person to do? I, for one, bought a little fabric and signed up for another swap.

And bought a number of new English Paper Piecing templates for an ongoing project which I had stopped work on a month ago due to... running out of templates. And some lack of idea where it was going.


The idea was to make an all red hexagon bed quilt, eventually, but I got bored. After cutting a zillion hexagons. I was throwing in some lighter ones, but I needed to start putting it together, and I was not inspired.


Anyway, this week, Amanda K (of What the Bobbin?) started posting to instagram these amazing hexagons made up of triangles and diamonds and half hexagons (and actual hexagons too) and I was all, I want to do that! So I ordered some of the other shapes all with the same measurement (apart from the half hexagons... which have one big size) and after they came I tried out a few variations:


So, that looks more fun. And I have the 1 1/2" HexEssentials fussy cut templates- a hexagon, a diamond, and a triangle, which are supposed to be used so you trace around the inside for the paper template and the outside for the fabric, but since my templates are smaller, the inside part is perfect for the fabric at least in the hexagons. (Admittedly, I'm not clear as to why the others aren't similarly swamped, but where I can't use the inside, the outside is better than nothing.


And my sad half hexagon template is made of wrapping paper. I could probably do better.


Now a quick look at my other paper piecing projects:

In this one I wanted to do some rosettes, and now have to work out a way to get a triangle to become 15" square to make a pillow cover. I always hit these walls of indecision!


And this one I've been cutting out, and I made enough tempates for 10 blocks, but 12 would be better, wouldn't it? I don't want to end up with another triangle...


I haven't even picked out the fabric, and everyone knows that's the best part of a project!