-->

Wednesday, October 26, 2011

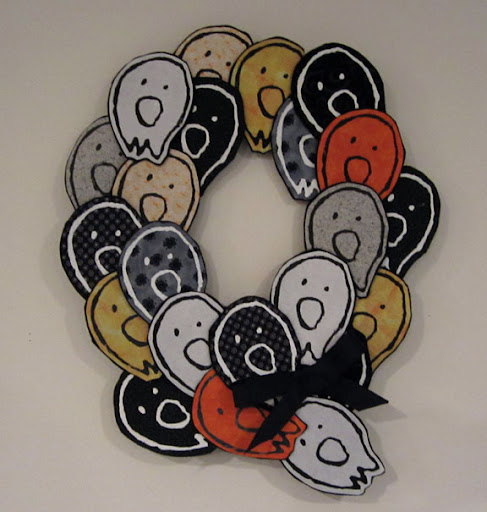
Ghost wreath!

ghost wreath
boo!

Just finished it. Now to find a place to hang it...

I put up a tutorial on Craftster.org, if you want to see some not so great in progress pictures I took with my phone.

Happy Halloween... eventually!

Friday, October 21, 2011

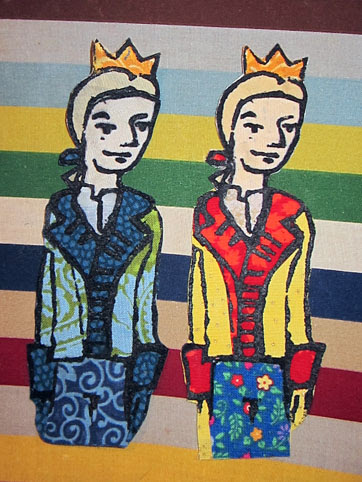
Cross Sectioned Crafts – folktale art piece: Two Princes

two princes


I printed these guys last night. This afternoon I assembled them, I thought I'd show you how that was done, and took pictures of the first, but when I came to the second, I did it completely differently, but roughly, here's the idea.

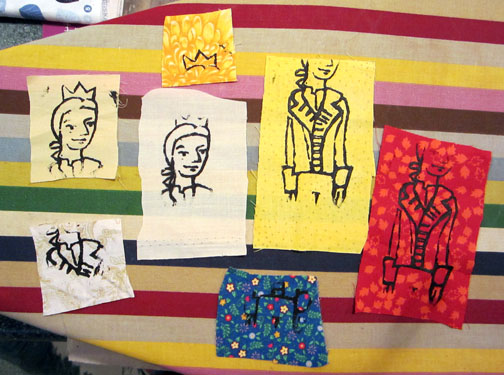
Prince in pieces
The prince in pieces

You know, technically, he's a king, not a prince. But, anyway.  And also, that's not the hair I used, I switched it out before assembled them. I made 2-3 prints of every piece I used, so that there would be replacements in case of unhappy prints.

Pieces were then fused to double-sided applique iron-adhesive. I'm using Heat-n-bond, which, I'll warn you, does tend to leak glue around the edges, but I'm using a second string iron, so it doesn't matter much.

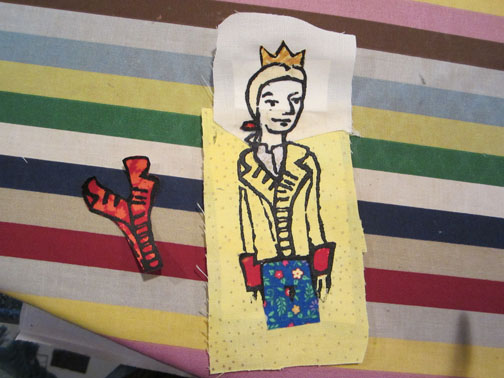
On this guy, I attached hair and crown to the head:

assembling the head
assembling the head

Then the head was attached to the body, the cuffs and pants and shirt onto the jacket piece, and lastly the trim.

assembling the outfit

Then I put a piece of this background cloth behind his head because the fabric I'm using for skin is a bit translucent, then put adhesive behind him, and cut him out.

and, done!

Of course, writing this out, and posting these pictures, I realized I messed up on that first jacket. His shoulder should be yellow, not red.

(For the second - his head was assembled on top of the piece that his hair was printed on, and the jacket was assembled on top of the trim. It doesn't seem that either is more effective, but after the third layer, it gets a bit thick and unwieldy.)

Thursday, October 20, 2011

Cross-sectioned Crafts - folktale art piece, day 4: pies

Day 2 was spent touching up the screens again, and yesterday I started printing.  Just a bit, though, I was short on time... I only did enough for panel one.

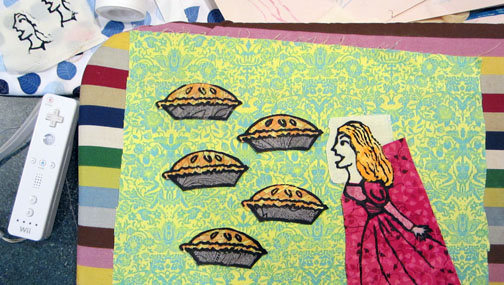
Today I assembled the prints:

panel one
It's a work in progress, right?

This is sitting on my ironing board.

I've printed on commercial fabrics (although her hair is hand-dyed fabric), then using applique adhesive, I've joined part of the prints together. The pies are cut out because they have adhesive on their backs, so they're ready to be placed in final places and stuck, but she's not cut out because she's not yet had that treatment.

And that's where it stands at present. Up to the minute reporting here.

Monday, October 17, 2011

Cross-sectioned crafts - Folktale Art Piece, Day 1

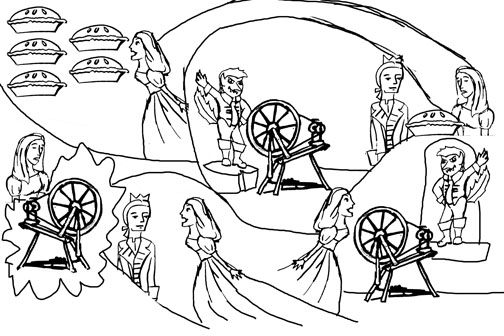
Day 1! Well, sort of. I've been working on this off and on for a few weeks, but it's just now getting out of planning and into reality.

Here is said plan:

cartoon
It's the English version of "Rumplestiltskin" called "Tom Tit Tot"

I am apparently intending to illustrate a number of folktales employing fabric arts to do so. I've got designs for an African story about dogs, and a Russian one involving witches ready to go...

Anyway, for this one, I just now tested the screens:

screen proofs
screen proofs
And they need some work. I'll touch them up tonight, and I expect I'll test them all again tomorrow, while I start picking out fabrics.

Now, I'll be going back to the cutting table to work on the backgrounds for one of the sections.

Honestly, I'm not entirely sure this will work, but I'm excited to find out!

Tuesday, October 11, 2011

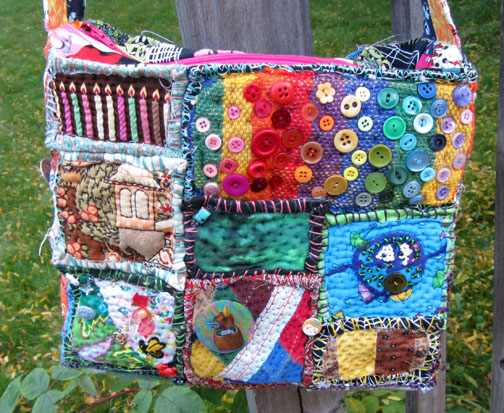
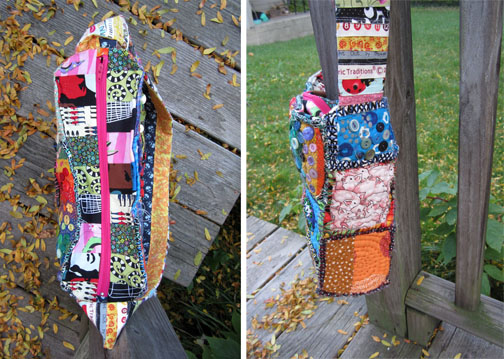
50 for 2011: #8 - a rainbow bag

Alright, like the one I made my sister, this is a Teesha Moore type bag. And the links to that are linked on that other post, so I'm not bothering now!

side one
side one - aren't the birthday candles amazing?

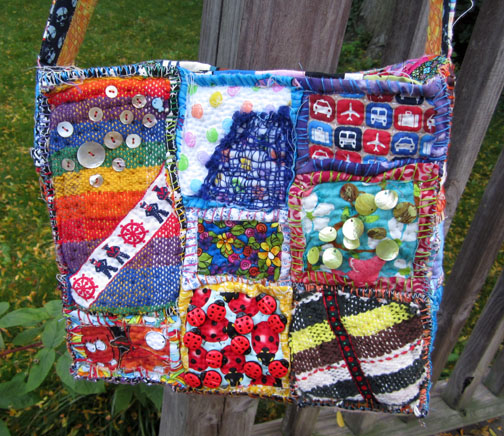
side two
bugs!
[

other views
other views
There is the other side (although, I didn't take a picture of it?), of course, and the bottom. And I guess this side view is the best shot of the strap, too. It's amazing, I'm very pleased with it. The strap and the bag, too. The only thing I regret is not putting interfacing the top where the zipper is.

inside
inside; please ignore my medicine bottle full of pins

Oh, and it's unlined, so it looks cool on the inside, too, but it also makes it less durable, I'm sure. Though, I'm intending it for a travel knitting or spinning bag, so, it's not meant for anything heavy.

....

Anyway, I kinda swore to myself I wouldn't make another one of these after that first one took ages, but then I was stuck in bed for like a week and a half, and being in between knitting projects, and having to send someone else into my stash to bring me something to do, I figured it was easier to locate my scrap box than send anyone in after yarn or knitting needles, which are organized in a way that only makes sense to me. And I had a few blocks left over from the previous bag... and a ton cut - often I'll cut a few 5" squares just to stash in the scrap box.... in case the mood hits me to do something I swore I'd never do again, I guess. Well, that's kinda me all over.

And it is a very portable project, up to the point of assembly.  Also, the kids liked playing with them and they were horrified when I started sewing them together.

One more picture! The center column is the bag's bottom. Sadly, the sides are not pictured.

most of the blocks
most of the blocks laid out for initial placement

It's funny, but I look at these pictures and I think of all the stories related to the fabrics or the designs or where I got things, and I'd like to comment on them all, but man, this post would take a million years.

But briefly: Two fabrics were woven by me. The white square is covered with a hand spun silk weavette square. One is a felted baby sweater. One is the leg off a pair of my husband's (clean!) socks. Two are fabrics my grandmother gave me. One was hand dyed by me for the jellyfish project (which I have finally started quilting!). One is made from leftovers from a zippered pouch.  And two fabrics have screen prints of mine on them, one of which was designed by my daughter, who put on the buttons on one of the other blocks. A number of fabrics and embellishments are leftovers from projects past (or current!)

This seems to put me at 26 for 50, and with, what, two and a quarter months to go? huh.

Thursday, October 6, 2011

Last minute jitters and a preview of The Bag

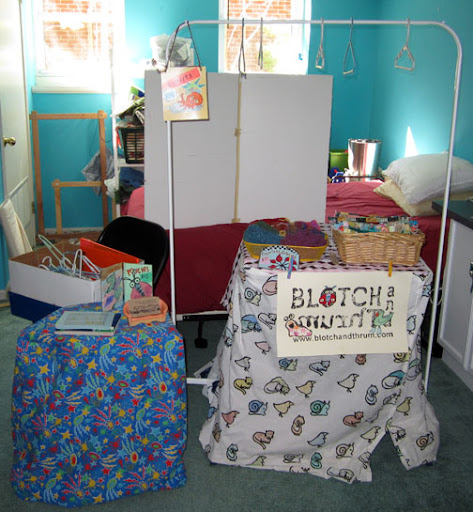
First, I've revised my booth layout, from what it was over the summer.  The new improved booth is set up in my basement (I'll take it down tomorrow!).

booth
I think it looks kinda.... sigh.

But I'm not certain I can revise it before Saturday! So, likely, this is it. I may add a sign on the blue table, and maybe decorate the clothing rack a bit, but otherwise... ta da! (The foam core screen is not part of the booth - it's just trying to block some of the mess in my guest room/sewing storage room from dominating the picture.)

Anyway, the bag! The bag gets a warm reception wherever it goes - tonight it went to a guild meeting. I've got the strap only partially attached, so it's not finished yet...

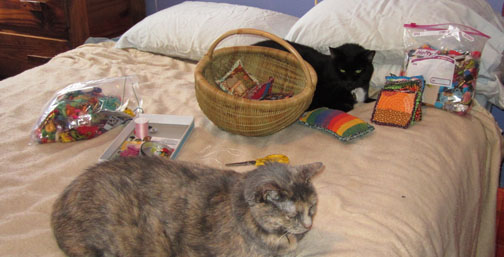
But, let me present some in process pictures:

bag in pieces with cats
the bag in pieces with cats

for the handle
and this became the handle

My first time working with selvages, though I've been saving them for awhile (obviously!). I'd wanted to do something with them seeing so many neat things, but mostly, I've just been using them to tie up skeins of yarn.

Wednesday, October 5, 2011

My fantastic test piece, and some news!

First the news!

I am going to be a vendor at an Ann Arbor craft show this weekend: Crafting with Grace. That's Saturday, October 8th, from 9am to 5pm. Very exciting!

Second, the proof of concept test! I have in mind a  ridiculously complicated art piece, but it will require printing on fabric and layering the prints... So, this is a fairly simple test run, that then became the centerpiece in yet another pouch.

a ghost
boo!
The ghost was printed on two pieces of my hand-dyed fabric, and then the green was cut and glued on with applique iron-on adhesives. I matched up the edges of the prints, so I didn't have to be too careful with the cutting.

The fabric on the top is what I used to line the pouch. Also: I put the tab on the wrong side! It's embarrassing. Still, overall, I'm very happy with the piece.

and the back
and, for the sake of completeness, the back.

So! Now, once this craft fair is over, (and the bag I've been working on is finished) and I get the Halloween costume I'm slated to make squared away, I can get down to working on that mysterious art project!

Tuesday, October 4, 2011

Cross Sectioned Crafts: Anatomy of a Screen Print

When I made up my most recent batch of prints, I thought here's an opportunity to lay out my process for you. Although I made three prints, I'm just showing you the one I designed on the fly - the others were drawn earlier, and therefore were disqualified.

sketches
1. sketching

I bought some bird fabrics, to go with a few other bird fabrics I had lying around, then I thought, I must have a bird print. I've actually been messing with the idea for a few weeks, but failed to come up with a design I was happy with. The final design was actually a combination of the two taller birds here, but is not actually pictured.

I like to sketch in crayon, because it gives a nice thick line, which is important for doing screen prints the way I do... primitively. ;)

The final drawing was scanned and then messed about with in PhotoShop. The end product:

retouched sketch
is quite a bit shorter than the original

The trouble is that for many applications I can't employ a screen print much taller than 5", so when I got the bird the right width, it needed to be compressed to be a usable length. Thank goodness for PhotoShop!

Then the picture was printed out at the proper size, and made into a screen print using the method outlined in this tutorial.

Once it was dry (over night is best!) I printed it (I use fabric paint - and a piece of cardboard on the inside to keep the paint from leaking onto the back) on a spare old onesie to check for mistakes:

test print
blue!

Then washed the screen and let it dry - I love the plastic hoops! I have some metal and wood ones, but the plastic ones are so great, because you can wash and dry them in the screen, and that is so much less messy.

test print
and now we examine what we've printed

At this stage, I like to compare the printed out picture with the printed picture. Some things, like the fuzziness of the feet, are just a printing error, and not a screen problem. But there are a few things I have to clean up here: the tail has a blotch in it, and there are a lot of loose speckles. These are pretty common with this method - my suspicion is that they come from putting fresh glue next to mostly dried glue, but who knows?

Once the screen has dried, a bit of pigment remains on it from the first printing, and this can be a great help in finding and fixing loose speckles. The rest - adjusting the thickness of lines, etc, is up to one's own particular desire.

Once I was satisfied, and left time for the screen to dry again, I could print the panels I needed for my projects (on hand dyed cloth, of course!).

bird pouches
(the fabric to the right is what I used to line both pouches)
And... those panels went into these pouches.