-->

Sunday, March 30, 2014

Me and paper-piecing, part 2

Yesterday, I took a class at Pink Castle Fabrics, a thing I do from time to time. I have taken at least four - two on applique techniques, and one on skirt making, and this one. And Pink Castle does a great job on finding great teachers. And I hope to take many more, because taking classes is, for me, the best way to learn something.

Setting up in the Pink Castle classroom. Paper piecing examples farther along the wall, nearer is a quilt top of the pattern Suburbs by Cluck-Cluck Sew which is the sample for another class.
Anyway, yesterday was a paper piecing class taught by Kathy Koch of Thread Bear Quilting & Embroidery. And, after my first paper piecing experience, I figured this would be a morning spent thinking about things that made my brain hurt, but it was surprisingly painless, first of all, because Kathy laid out the rules and the order you have to do each step so well, and then once I realized that we were building the pieces upside down. I will not attempt to explain it further, or my brain will begin to hurt.


We were using this adorable Fox pattern from Shape-Moth, and I got about halfway through it before the end of class. It may have benefited me to have had previous experience with paper-piecing, but who knows, maybe I'm a natural. (Not really, I still had to unpick several things...)

What I did learn, though, is that my machine is not great about those tiny seams. That eye is being held together by the force of the ironing, I expect, one of those small seams came apart when I took out the paper. I started backstitching my seams after that, to keep them more together. It's one of my quibbles with my machine - the first two stitches are super loose, then all the following stitches are just fine, but if the seam is only 6 stitches long, that becomes more of a problem. And when you're pulling out the paper under those loose stitches, well, that looseness spreads.

As of last night I was 3/4 done:

picture taken at midnight in my basement...
And am now spending my free time (ha!) looking at blocks and deciding how they could be paper pieced. Because, well, look at all the tiny detail you can cram in! I love tiny detail. I think I will probably not do many adorable animals, but the idea of doing traditional blocks in a crazy scaled down way appeals to my particular madness.

And, I may finally attempt New York Beauty!

Monday, March 24, 2014

Camp Stitchalot Spring!

I went to Camp Stitchalot this weekend. And I hardly took any pictures. Guess I was too busy sewing?

I stayed in the jungle room (each room has a theme - on the second floor, there is the doll room (which I usually stay in, which is generally considered to be creepy) and the angel room (which I would never stay in, because I think it's much creepier than the doll room.)) The jungle room is a pretty yellow, gets lots of sun, and has a balcony, though it's still too cold for a balcony.  There were three of us sharing, it's a camp, after all.

Early morning.
Well, I was neither the first person up, or the last to bed, and I'm still exhausted. It was tons of fun, though! And there were lots of snacks! And everyone was amazing.

This camp was all about bags. The teachers were Sara Lawson of Sew Sweetness and Kristin Link of Sew Mama Sew. We made two bags (we started two bags, and many people finished both).

I finished one, Kristin's tackle bag (the pattern isn't published, so there's no link to give you- yet).


I used this fabric I had screen printed and dyed long ago, along with a coordinating star print for the handle, and some Summersville Spring to space it out, as I didn't have enough skulls to just use skulls. The interior is that cream circle and star print from Clover Sunshine, and it has a welt pocket! I made a welt pocket!

Sara taught the Camp Stitchalot bag, and I'm pretty far with it, but it will have to be another post, I'm maybe 5 steps from finished with it? But I have a few things ahead of it in the queue to be finished.

I also made a second made to measure skirt for me - though it still needs to be hemmed, and have some basting stitches removed - using this Lizzy House medals print from a few years back. I'll show that too, once it's done. I've decided I can't start a new skirt (or blog the two that are not yet hemmed) until I hem those.


In summary, Camp Stitchalot was completely awesome! I'm so glad I went! But now I need to sleep...

Thursday, March 13, 2014

Garden Party Tango Antique Tile Quilt

Well, the fabric is available now, so this may be the time to start talking about this quilt!


What happened was this, one day, I was hanging out with my friend Brenda at her house, and we went to visit her fabric stash, and I put my hand on this fat quarter bundle, and my hand got stuck to it.  She said she needed to make it into a shop sample, and I said... I'm not sure what I said, but it amounted to begging her to let me take the bundle home. So, I am making the sample.


And I'm half done! I finished the third row Wednesday night.

Okay, so the block far left is messed up, but I caught that (after the picture) and it's fixed now.
Of course, that still leaves three rows to go...

The fabric is Garden Party Tango by Melissa Ybarra. I am crazy in love with this fabric! The pattern is a variation on a traditional block called Antique Tile, but since that's a three color block, I had to switch it up a bit. Faith of Fresh Lemons has a cool take on Moderning up the Antique Tile block, but I came by it via the Quilter's Cache. My second quilt ever was a (also non-standard) Antique Tile quilt, it's kind of my go to pattern.

Well, we can talk more about it when it's finished, now I want to go and sew!

Wednesday, March 12, 2014

Echino Circle Skirt

I have had this book about making skirts without a pattern for a long long time, and I'm not going to recommend it because I am not entirely pleased, but I finally made a skirt using this book!


The fabric is this excellent Echino print from last year - It's called Pepe - on the soft linen cotton blend, and it's 54" wide, so you don't have to join pieces (though, I did - it's a directional print and I didn't want it to be upside down in the back).  I used two yards (well, I bought two yards, but frankly, it's a yard and a half for the skirt and 6-8" for a waist band, so you could get away with a 1 2/3 yards?)


I've got the same fabric in purple for my Camp Stitchalot bag. As much as I like the green, I think the purple is even better!

So, I did a zipper closure and a button, with a slight gather, because the way they have you estimate your waist made it a bit too large. But having taken Rae's skirt class, I am now an expert at gathering skirts. The problem, frankly, was the zipper, which looks terrible, and I followed the directions, and talking it over with my sister who knows about these things, we came to the conclusion that the book skips over a step or three, which is why I am not telling you about the book. But my next skirt will be awesome (awesomer! Still really happy with this one, poor zipper installation or not.)


Obligatory swirling shot. Sorry it's blurry. One of the kids was in charge of the camera, and swirling makes me super dizzy... so we didn't have a second take!

The other problem with circle skirts is the resulting two miles of hem. It was a lot of ironing and a lot of pins, followed by a lot of blind hem stitching. And when I dug out my blind hem foot, it had snapped into two pieces. So I used the standard foot instead. Which was fine, and what people have used for years and years, and I probably won't get that broken foot replaced, because as nice as it was, it's not a necessity in anyway.

Looking forward to wearing this without leggings soon!

Monday, March 10, 2014

Little Red Ridinghood will hang out with anyone

I was talking about this at today's sew in for the Ann Arbor Modern Quilt Guild. And the general reaction was, it's a good problem to have. But! That still means it's a problem.

I bought a yard and a half this super amazingly awesome Japanese fabric from Pink Castle Fabrics:


And I want to make a two person lap quilt that I can use when I read to my kid, cause currently, we are huddled under a baby quilt, and my feet get cold. It's a fairly large print, and needs a large block. So, somehow, I got stuck on the idea of 9.5x6.5" blocks, of which I think (if I did my math right) I can have 30.


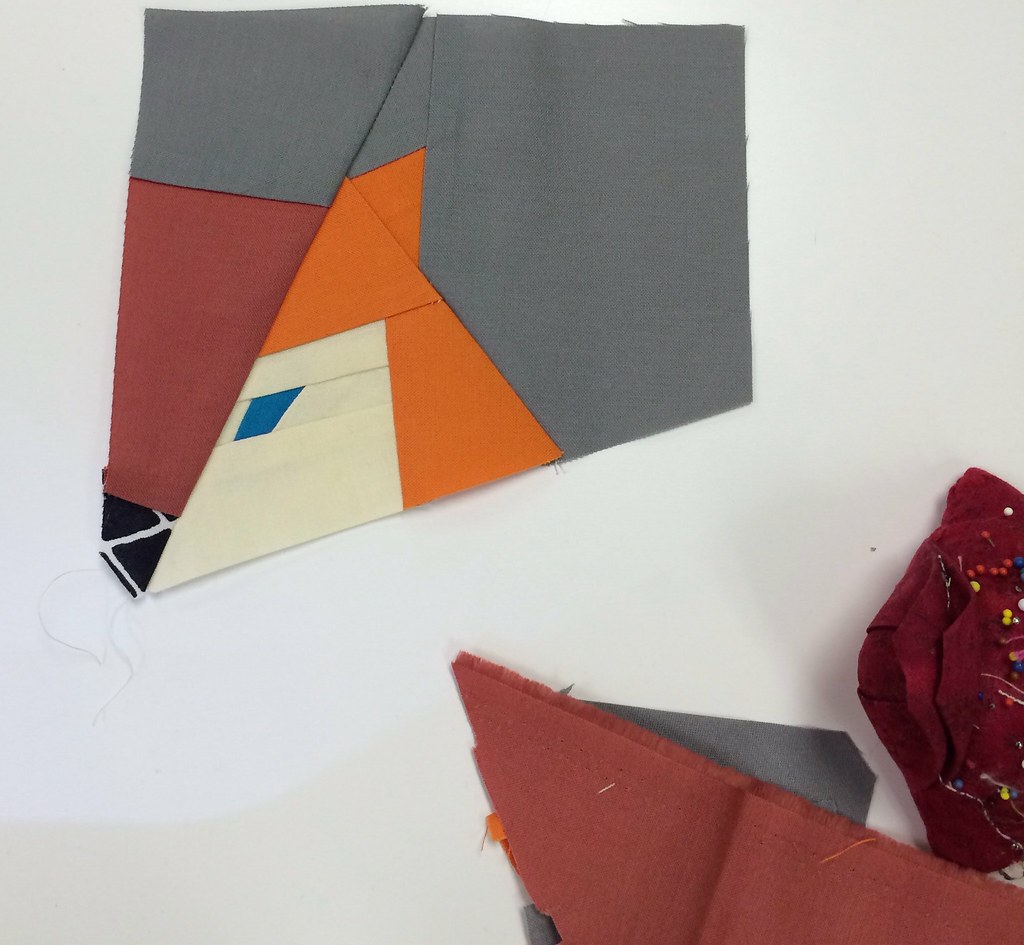
I made this sketch, the idea being to stretch the fabric out with solids, and I thought pink, green and mustard would be an interesting contrast, but of course, when I went to buy fabric I bought *red*.


...Okay, I thought, how about something more log cabiny than stripey?

But that looks a bit evil, really, and the stripes aren't working for me, either. And then, as I was putting away some fabric, folding it on my ironing table, when my Red Ridinghood fabric now lives, I thought, Hey! It looks awesome with the Wee Wander trees! So, I bought another half yard of those...


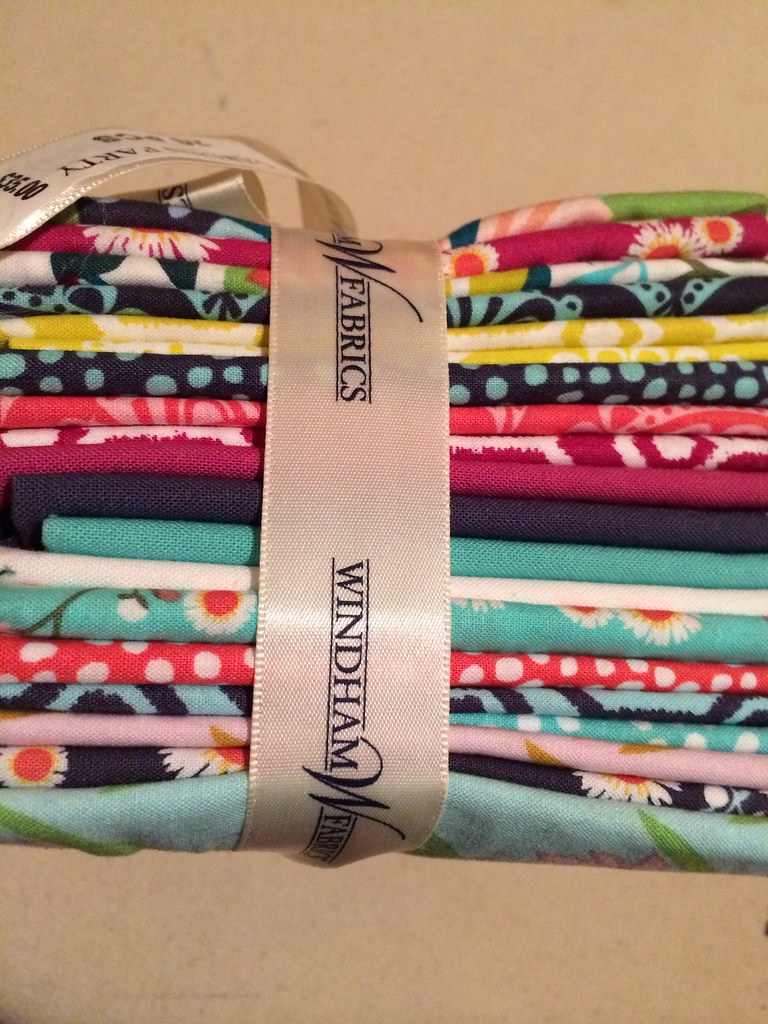
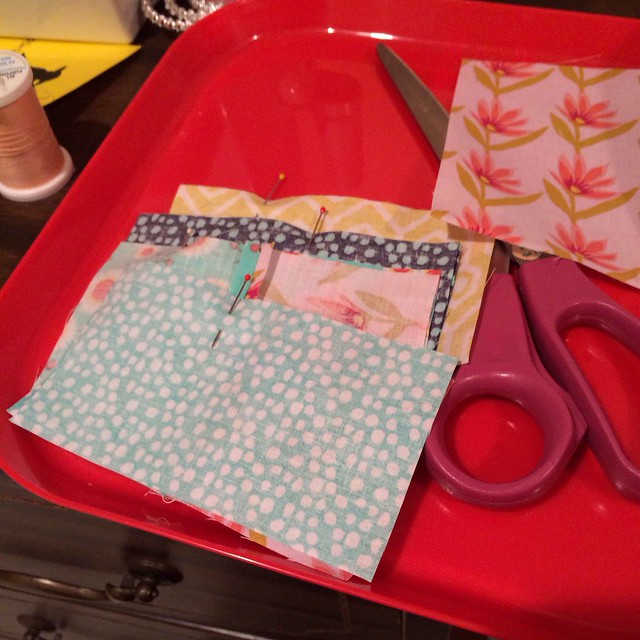
And Friday night, I was cutting into my new Enchant fabrics, and I thought, wouldn't it be great, because they are just so adorable, if I could use those in this quilt too:

(the top one is also Wee Wander)
Leading to another sketch:
Which is sort of a progression from water to sky. The grey boxes will be the main print. And I was all about trying to track down that frog print from Heather Ross's most recent line, Briar Rose, for the blank row, but then I came to my senses.


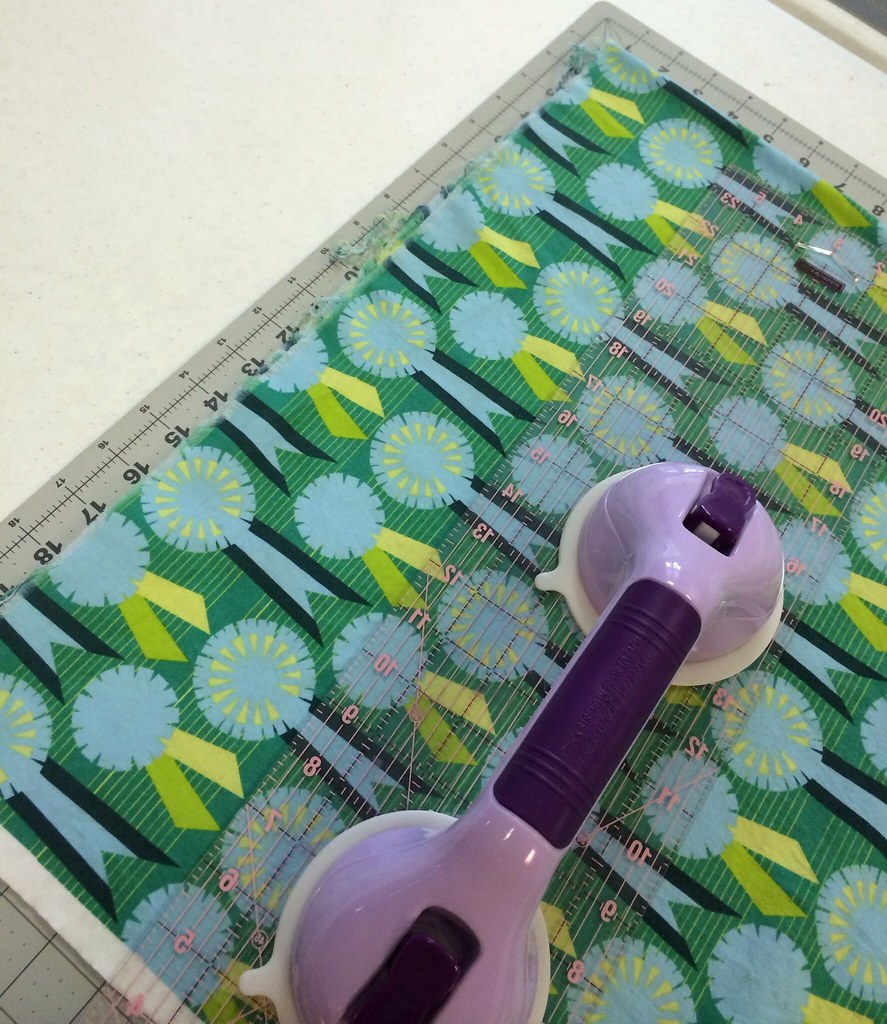
But I was also cutting this fabric, it's an old Anna Maria Horner print, set them next to each other, and it is as if they were made for each other. Brown, pink, mustard, blue, red! Imagine those giant flowers sitting next to tiny Reds and wolves!


Then I went crazy and tried magenta, and... it still kind of works. There is enough pink and purple in the fabric. But not so crazy about the Salt Air waves.


Blue, of course, works.... So does green:


Catnap? This fairy tale print? Maybe not together, but separately, they'd do fine.


Picture Pie? The fish may be too lime, but those flowers and birds are cool.


And then I happened to lay it next to this particularly amazing 80s floral and my mind was blown. It works!

Not that I am going to go with that.... So, now I languish in a void of indecision. My design wall is packed with another quilt, so I can't play now. I kind of want to make all the possibilities, and yet, only come out with the best one.

So, what do you think?


Tuesday, March 4, 2014

So, it's Tuesday evening...

And I am wondering whether to scramble for a Work in Progress Wednesday post.

I am working on something.

Several things, frankly.

Not sure I'm ready to go public with anything. I don't have any long stories in me at the moment.

I also have lots of schoolwork... Though at least I managed to get prereqs waved for the classes I'd like to take before registration starts. Which is sort of a miracle; I'm becoming the queen of dropped balls. I'm also obsessing over Camp Stitchalot. It's a wonder I haven't started packing. I do find myself staring at the calendar, willing the time to pass.

I'm also obsessing about this pattern I just bought. I have a great desire to make a lot of little houses. I'm thinking solids, a color gradient. Like a sunrise? Nothing concrete, I'm afraid.

I'm having a moment of being all plans and no action. Or, more precisely, having too many plans and being mired in all of them.

Saturday, March 1, 2014

Sewing room expansion!

I've just completed (well, mostly) my newest sewing room updates, complete with a trip to Ikea, so I thought I'd share.

This is my cutting surface, the clearest it's been in years. About half of the desk and all the the little file cabinet is storage for patterns.  The red Ikea drawer unit holds thread, quilting notions, buttons, and orphan blocks.

Opposite the desk:


This is also pretty much unchanged - my sewing table (stores bobbins, hand sewing supplies, machine parts and manuals, bag hardware, zippers, etc.) On top two machines, dvd player (very important) and ironing table.  Although the addition of storage for interfacing and batting in the hall outside the room, has eased the amount of stuff I had crammed under the ironing board. It's not very attractive, but amazingly useful to have this organized:


Looking towards the closet, beside the sewing table I have a rolling cart, the bin on top is for projects that I can work on when I am away from my machine (it's empty! gasp!) and under it are two bins of linen (one solid, and one printed) and two bins of ribbon and trim.


The top shelf is bobbin lace supplies, mine and those I inherited from my great aunt, three shelves of scraps, the Ikea drawer unit that I store WIP and my new rolling Raskog... It's awesome, it's thin enough to get in and out of a small space, and can roll over to either the sewing machine or the design wall...

Which is opposite my fabric in this half room in the hallway:


I got a new bookcase for it at Ikea, as well, the right one - the bookcase that was previously holding that fabric is now back to holding batting. With four shelves rather than three, I now have storage for large cuts (at the bottom) rather than full and queen sized backings (on the top). I also moved the Big Shot over here, because it had outgrown (well, the dies) its allotted space inside the sewing room. The pile of fabric on the top left is stuff I think I should destash eventually.

There is another bookcase, in another closet, that holds all my non-linen, non-quilting cotton fabric stash, but it's best not mentioned. Except that having enough places to put everything certainly makes having a lot of stuff a lot less crazy making. Though, seriously, I have too much stuff. 

And here is the design wall (and the carts!) in action. I'm working on a quilt using the fabric line Garden Party Tango by Melissa Ybarra of Iza Pearl Design, whose last collection was the awesome Hello Gorgeous.


And that's the tour! Any questions?