-->

Sunday, March 24, 2013

The One with Feathers

So, this quilt was inspired by these pillows by Katy Jones of I'm a Ginger Monkey. Only, in order to get it the size I wanted, I had to deviate from her layout.

Of course the layout I came up with requires partial seam assembly, but I only had to rip it out once, so that counts as a victory, right?


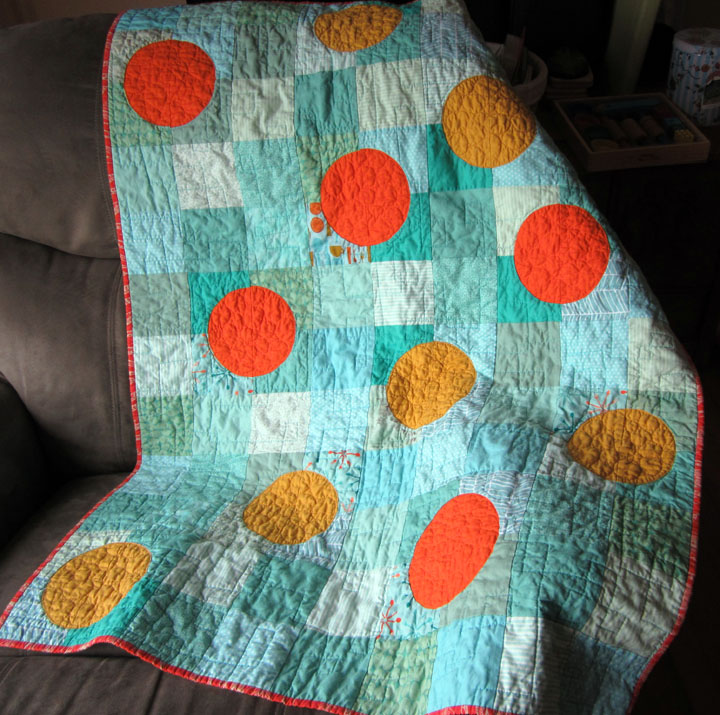
I call it "drunkard's dice" myself.

Well, not sure what to say about it, other than to list off the fabrics I used, but I'm not sure anyone is that interested. It's a mix of blenders and solids, and a few tone on tone prints, most of which came from Pink Castle Fabrics. And I worked in two Lizzy Dish prints because I couldn't stop myself. It has a voile binding that is these huge feathers, but you can't tell, I think, but it's a nice touch, believe me, because....
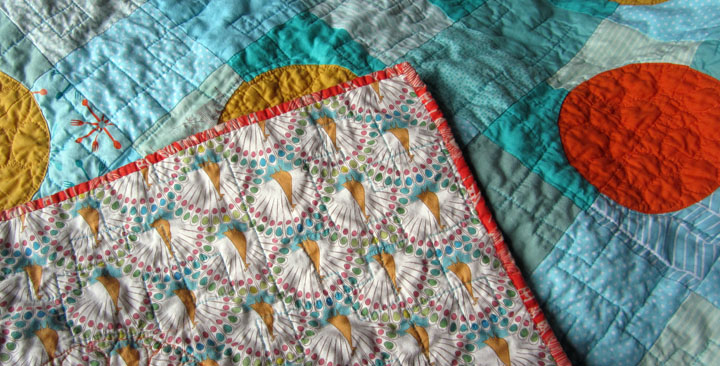
Peacocks!!!
The backing is this wonderful (if upside down in this picture) peacock fabric (Thomas Knauer, Andover). I had been referring to it as "the thing with feathers" until I came up with the dice idea.
It is claimed that working with voile is hard, but I starched the hell out of it, (as someone advised on the internet) and it was fine.

I quilted pebbles in the dots and a loose geometric free motion pattern as the background. And though my squares weren't square, and my angles were wildly varied, I'm pretty happy with it.
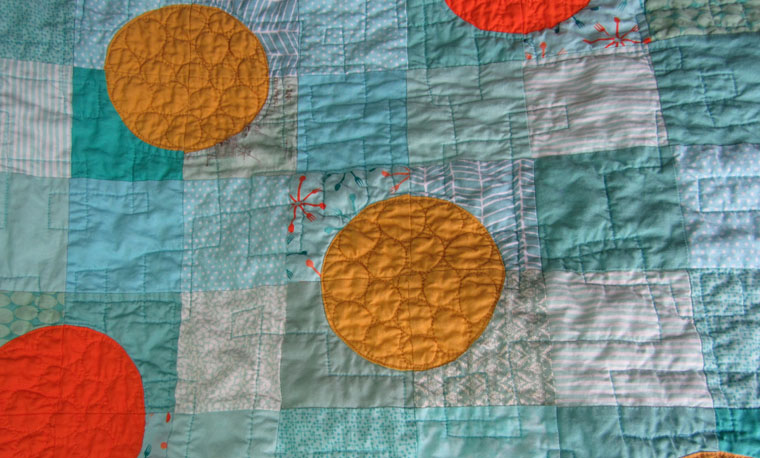
close up!

In other news, I am thinking about printing with dye, if I can get around to making the thickener. I bought some fabric markers, which seem neat, and I want more, but I figure I should test them for wash fastness first.  And I am working on putting the pieces I created at a class I went to (two weeks ago?) into a bigger quilt - hoping to finish that this week, well, at least the top. And I have gone a little way towards finishing my scrappy trip around the world quilt - well, all the blocks are done, but turns out, they're not all the same size, and some may need dire surgery... So there is that to look forward to!

And after that I want to make a rainbow of these in every possible color combination! :D

Sunday, March 10, 2013

Batik catch up

So, this is embarrassing. I am going to be uploading a ton of pictures, which may have the appearance of making me look super productive, but sadly is months of work that I'm catching up on blogging about.

Chronologically, this piece is first:

complicated!
And I don't remember much about it, except the applying first round of wax took me four times as long as I expected. I used a template, cut out of hard plastic, and traced around with soy wax on a paint brush. I painted in some blue fabric paint, which became green in the yellow dye. I think I used four dye baths? (Yellow, dark yellow, orange, red) Waxing between the baths to trap the color of some flowers and not others. The point was to let the original outlines disintegrate. It was only mildly successful. I think the blue may have been a mistake?

It had a much simpler companion:

I call this one "stripes"!
Then, during November I got interested in stamping with wax, after reading Rossie's blog post here, and then the recommended book, resulting in:


many pieces made over a few months
 Top left: large crayola marker cap and medicine bottle. Top center: drinking straws glued to a cardboard form to make a unit of four. Top right: plastic square, assorted plastic containers, spool. Bottom left: cardboard shapes and cookie cutters (love the X). Bottom center: clothes pin and plastic containers and that same plastic square. Bottom right, a star made out of cardboard - dyed grey, then more stars, then overdyed purple.

And more recently:

The screen print with batik, my specialty!

Printed, eyes painted with wax, dyed grey, faces painted, then one of two purples, then overdyed with the same intense blue. (Actually, I think it's called "intense blue" on the bottle) I went dark with them because due to a breakdown of the screen, their faces have many blemishes, and I figured the usual sunny colors would increase the contrast and therefore the appearance of the marks.

And then there is this, another complicated piece:

the inset is my favorite skull
So, I was reading a magazine someone handed me, Sew News from June 2005. In the article "Make Your Mark" by Lois Ericson, she demonstrates a technique of masking prints (she's stamping, but same difference) with freezer paper. This makes your first print appear to be in front of the next print.
So, I printed skulls 4" apart (close as I could with the screen I am using), waited a day for them to dry, heat set them, ironed on a piece of freezer paper cut out in the same shape, and printed another group, and repeated, for five or six days, until it was all skulls. I then pulled off the paper, made doubly sure about the heat set, and painted every skull with wax, then dyed the whole thing grey. Then I waxed the spaces between the skulls and dumped it in purple. I was hoping that the wax would hold together and I'd just get purple in a few cracks. Instead, I got mostly purple skulls, with the white preserved only where I used my wide brush to paint the grey background.

I should have known better. Time after time I have proven conventional wisdom right - soy wax does not hold up to repeated dye baths. (Still! the clean up is so easy!) Ah, well, I can always start again.... ;)